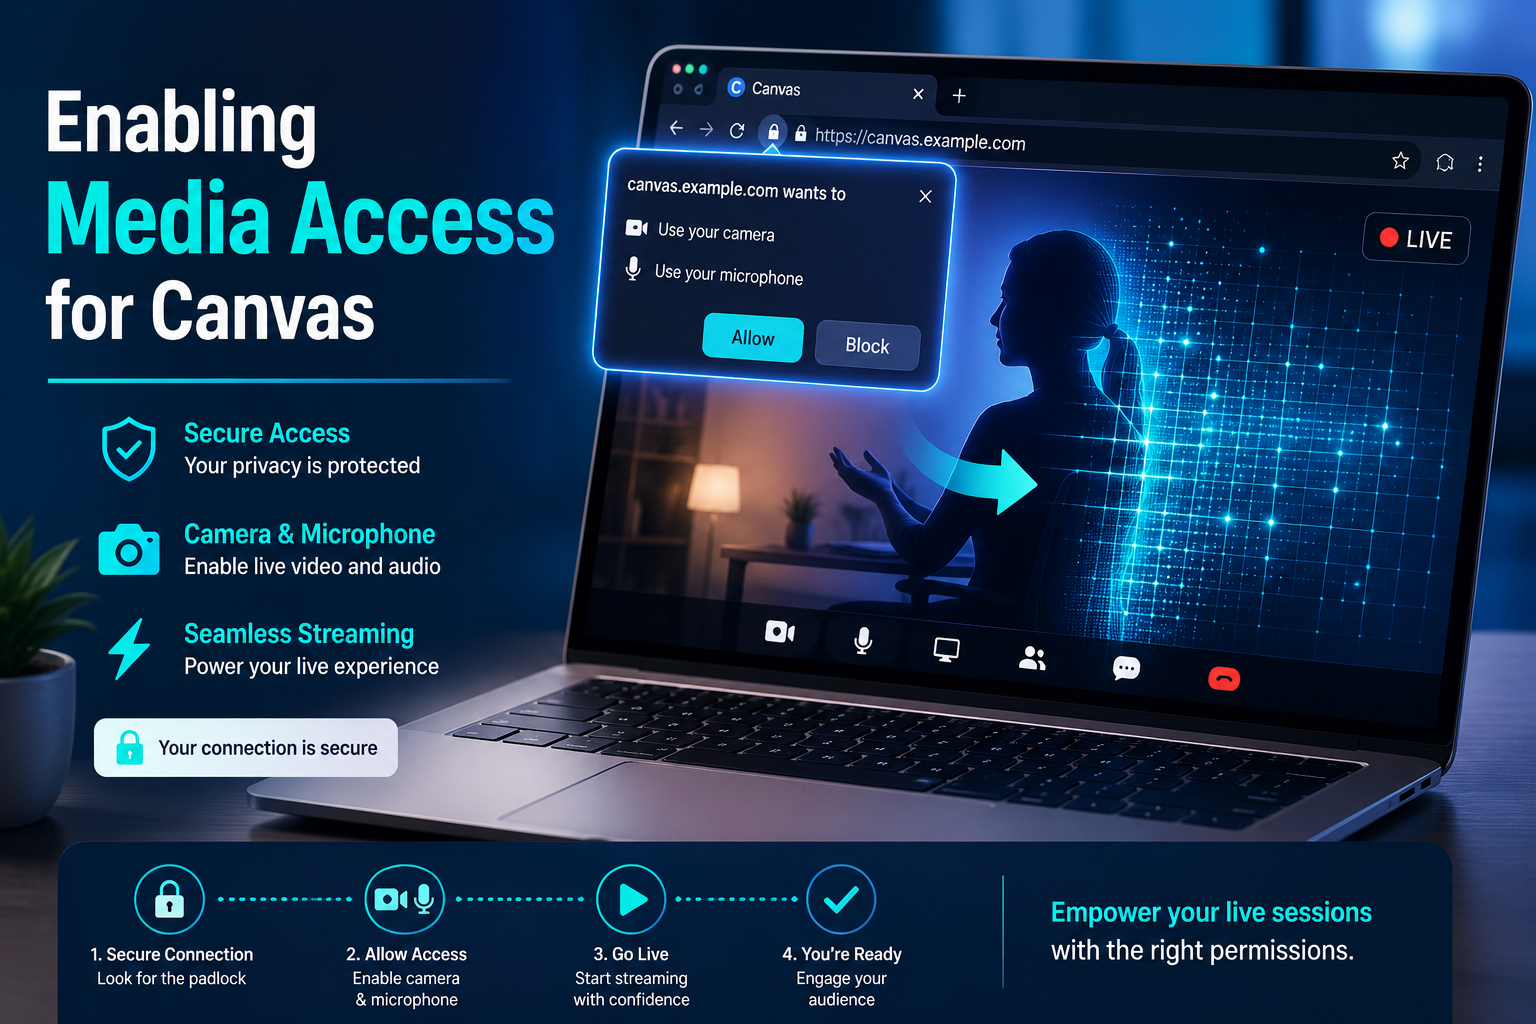
To enable a web application’s HTML5 Canvas to access your microphone and webcam, you primarily grant permissions to the browser, which then allows JavaScript to capture media streams using the getUserMedia method. This method captures audio and video from your devices, usually piping it into a hidden <video> element, which is then drawn onto the Canvas. Users must explicitly grant these permissions through a browser prompt for security and privacy reasons.
Understanding How Webcams and Microphones Interact with Canvas
Direct Canvas access to your microphone or webcam is a common misconception. The Canvas element itself does not directly communicate with your hardware. Instead, modern web browsers use the MediaDevices API, specifically the getUserMedia function, to access your devices.
This function returns a MediaStream object containing your camera and microphone data. Developers typically feed this MediaStream into a standard HTML <video> element. The Canvas then repeatedly captures frames from this video element to display real-time video or perform processing.
The Role of getUserMedia
getUserMedia is the core JavaScript function that requests access to your media input devices. It is part of the WebRTC (Web Real-Time Communication) standard, enabling real-time audio and video capabilities in web browsers. This method ensures secure and privacy-respecting access to sensitive hardware.
The function requires a set of “constraints” to specify the desired media types. For example, { audio: true, video: true } requests both microphone and webcam access. You can also specify resolution, frame rates, and which specific device to use.
Why a Video Element Before Canvas?
Using an intermediate <video> element is crucial for several reasons. It efficiently handles the decoding and playback of the camera stream. This offloads complex media processing from your JavaScript code and the Canvas rendering pipeline.
The <video> element provides a standardized way to manage video streams. Drawing from it onto the Canvas is a highly optimized operation. This approach ensures smoother performance and broader browser compatibility for your applications.
Step-by-Step: Granting Browser Permissions for Media Access
As a user, granting permission is usually straightforward. When a web application attempts to access your microphone or webcam, your browser will display a clear prompt. This prompt asks for your explicit consent to share your devices with the website.
Always review which website is requesting access before approving. Granting permissions to untrusted sites can compromise your privacy. Reputable applications will only ask when necessary.
Initial Permission Prompt (User Action)
When an application first calls getUserMedia, your browser presents a permission dialog. This dialog typically appears at the top left of the browser window, near the address bar. It will clearly state which website is requesting access and for which devices (microphone, camera, or both).
You will usually see options like “Allow” or “Block.” Clicking “Allow” grants the website temporary or persistent access to your devices. Clicking “Block” prevents the site from accessing them.
Browser-Specific Permission Management
Permissions are often site-specific and can be managed directly in your browser settings. If you accidentally block a site or want to revoke access, you can adjust these settings. Each major browser provides a way to review and modify camera and microphone permissions.
Google Chrome
To manage permissions in Chrome, click the padlock icon in the address bar next to the website’s URL. A dropdown menu will appear, showing “Site settings” or directly listing “Camera” and “Microphone” options. You can change “Ask (default),” “Allow,” or “Block” here.
For more granular control, navigate to Chrome’s main settings: go to chrome://settings/content/camera or chrome://settings/content/microphone. Here, you can see all sites that have requested permissions and modify them individually.
Mozilla Firefox
Firefox also displays a permission prompt when media access is requested. You can check “Remember this decision” to avoid future prompts for that site. To manage existing permissions, click the padlock icon in the address bar.
In the site information panel, click the arrow next to “Permissions” to expand the list. You can then change the “Camera” and “Microphone” settings for that specific site. Alternatively, go to Firefox settings, search for “Permissions,” and manage camera/microphone access there.
Microsoft Edge
Microsoft Edge’s permission system is similar to Chrome, built on the Chromium engine. The permission prompt appears at the top of the browser window. You can click “Allow” or “Block” directly.
To review or modify permissions, click the padlock icon in the address bar and select “Site permissions.” You can toggle access for “Camera” and “Microphone” directly from this menu. For global settings, go to Edge settings, then “Cookies and site permissions,” and select “Camera” or “Microphone”.
Apple Safari
Safari handles media permissions via its “Website Settings” menu. When a site requests access, a prompt appears asking for permission to use your camera and microphone. You can choose “Allow,” “Deny,” or “Not Now”.
To manage permissions for a specific site, navigate to Safari > Settings > Websites. From there, select “Camera” or “Microphone” from the sidebar. You can then choose “Ask,” “Deny,” or “Allow” for each visited website.
Essential Requirements for Camera and Microphone Access
Several technical prerequisites must be met for getUserMedia to function correctly. Developers must implement these, but users should be aware of them for troubleshooting. Adhering to these requirements ensures a secure and functional experience.
Secure Context (HTTPS)
A critical requirement for getUserMedia is that the web page must be served over a secure context. This almost always means using HTTPS (Hypertext Transfer Protocol Secure) instead of HTTP. HTTPS encrypts communication, protecting user data from eavesdropping and tampering.
Browsers will actively block getUserMedia calls on insecure HTTP pages. This security measure prevents malicious sites from capturing sensitive media without proper encryption. Always check the URL for a padlock icon, indicating a secure connection.
User Interaction
Most browsers require some form of user interaction before initiating a getUserMedia request. This prevents websites from secretly turning on your camera or microphone without your knowledge. Typically, a user must click a button or perform another explicit action.
This interaction serves as an additional security layer. Developers should ensure their applications wait for a user action before calling the media API. Prompting without interaction will likely result in a blocked request.
Device Availability
For an application to access your devices, they must be physically present and correctly configured. Ensure your webcam and microphone are plugged in and recognized by your operating system. Check device drivers and system settings if issues arise.
Some devices might be in use by other applications, leading to conflicts. Close any other software that might be using your camera or microphone. This includes video conferencing apps or recording software.
Developer’s Guide: Implementing Canvas Microphone and Webcam Access
Developers use JavaScript and the MediaDevices API to integrate camera and microphone functionality. The process involves requesting permissions, handling the media stream, and rendering it onto an HTML Canvas. Proper error handling and security considerations are paramount.
Requesting Media Access with getUserMedia
The core of media access lies in the navigator.mediaDevices.getUserMedia method. This function returns a Promise that resolves with a MediaStream object if access is granted, or rejects with an error if denied or an issue occurs.
<video id="videoElement" autoplay></video>
<canvas id="canvasElement"></canvas>
<button id="startButton">Start Camera</button>

<script>
 const video = document.getElementById('videoElement');
 const canvas = document.getElementById('canvasElement');
 const context = canvas.getContext('2d');
 const startButton = document.getElementById('startButton');
 let stream;

 startButton.addEventListener('click', async => {
 try {
 // Request both audio and video
 stream = await navigator.mediaDevices.getUserMedia({ audio: true, video: true });
 video.srcObject = stream;
 video.play; // Start playing the stream in the video element

 // Set canvas dimensions to match video
 video.addEventListener('loadedmetadata', => {
 canvas.width = video.videoWidth;
 canvas.height = video.videoHeight;
 drawVideoToCanvas; // Start drawing frames
 });

 } catch (err) {
 console.error('Error accessing media devices:', err);
 // Handle different error types gracefully for the user
 if (err.name === 'NotAllowedError') {
 alert('Permission to access camera/microphone was denied. Please check your browser settings.');
 } else if (err.name === 'NotFoundError' || err.name === 'DevicesNotFoundError') {
 alert('No camera or microphone found. Please ensure they are connected and enabled.');
 } else if (err.name === 'NotReadableError' || err.name === 'TrackStartError') {
 alert('Camera or microphone is already in use or inaccessible.');
 } else {
 alert('An unknown error occurred while trying to access your media devices.');
 }
 }
 });

 function drawVideoToCanvas {
 if (video.readyState === video.HAVE_ ENOUGH_DATA) {
 context.drawImage(video, 0, 0, canvas.width, canvas.height);
 }
 requestAnimationFrame(drawVideoToCanvas); // Continuously draw frames
 }
</script>
Handling MediaStream and Video Element
Once getUserMedia successfully resolves, it provides a MediaStream object. This stream is then assigned to the srcObject property of an HTML <video> element. The <video> element then handles the live playback of the camera feed.
The video.play method is called to ensure the stream begins playing. It’s crucial that the video element is configured with autoplay or explicitly played. Without it, the stream won’t activate.
Drawing to Canvas
After the <video> element is actively playing the stream, its content can be drawn onto an HTML <canvas> using canvas.getContext('2d').drawImage. This method takes the video element as its source.
To create a live feed effect, the drawImage function must be called repeatedly. This is typically done within an animation loop using requestAnimationFrame. This ensures smooth and efficient updates to the Canvas.
Stopping Media Tracks and Releasing Resources
It’s vital to stop media tracks and release resources when they are no longer needed. Failing to do so can lead to privacy concerns and resource drain. Call the stop method on each track within the MediaStream.
<script>
 //... (previous code)

 function stopCamera {
 if (stream) {
 stream.getTracks.forEach(track => track.stop);
 video.srcObject = null;
 stream = null;
 console.log('Camera and microphone stopped.');
 }
 }

 // Example of stopping:
 // document.getElementById('stopButton').addEventListener('click', stopCamera);
</script>
This action turns off the camera and microphone indicators in the browser and releases hardware access. Always provide a clear way for users to stop the stream within your application.
Advanced Considerations and Best Practices
Going beyond basic implementation ensures robust and user-friendly applications. These best practices enhance security, performance, and user experience. Thoughtful design improves overall application quality.
Specifying Constraints and Device Selection
getUserMedia allows precise control over media tracks through “constraints.” You can specify desired resolution, frame rate, and even select specific camera or microphone devices. This improves user experience and application compatibility.
Use navigator.mediaDevices.enumerateDevices to list available media input devices. This enables users to choose their preferred camera or microphone from a dropdown menu. Provide meaningful labels for devices.
<script>
 async function getDevices {
 const devices = await navigator.mediaDevices.enumerateDevices;
 const videoDevices = devices.filter(device => device.kind === 'videoinput');
 const audioDevices = devices.filter(device => device.kind === 'audioinput');

 console.log('Video Devices:', videoDevices);
 console.log('Audio Devices:', audioDevices);

 // Example of selecting a specific device:
 // const constraints = {
 // video: { deviceId: videoDevices.deviceId },
 // audio: { deviceId: audioDevices.deviceId }
 // };
 // await navigator.mediaDevices.getUserMedia(constraints);
 }
 // getDevices; // Call this when your app loads
</script>
Error Handling and User Feedback
Robust error handling is critical for a good user experience. The getUserMedia Promise can reject for various reasons, such as permission denial, no devices found, or hardware issues. Providing clear, actionable feedback to users is essential.
Different error names (e.g., NotAllowedError, NotFoundError) indicate specific problems. Tailor your error messages to guide users on how to resolve the issue. For instance, instruct them to check browser settings or connect a device.
Privacy and Security Best Practices
Always prioritize user privacy when working with media devices. Only request access when absolutely necessary and clearly communicate why it’s needed. Never capture or transmit media without user consent.
Display a visual indicator when the camera or microphone is active. This reinforces transparency and reassures users their devices are not being used covertly. Implement strong data protection measures for any recorded media.
Performance Optimization for Canvas Rendering
Drawing video to Canvas can be computationally intensive, especially at high resolutions. Optimize performance by drawing only when necessary and considering offscreen canvases or Web Workers for heavy processing. Reduce frame rates if needed.
Using requestAnimationFrame for your drawing loop is a best practice. It synchronizes updates with the browser’s rendering cycle. This prevents unnecessary redraws and conserves battery life.
Common Challenges and Troubleshooting
Users and developers may encounter issues when trying to access media devices. Understanding common problems helps in quickly resolving them. Systematic troubleshooting saves time and frustration.
“Permission Denied” Errors (NotAllowedError)
This is the most frequent error, indicating the user explicitly denied permission or the browser blocked it. Guide users to check their browser’s site settings. Remind them to look for the padlock icon in the address bar.
For developers, ensure you’re calling getUserMedia within a secure context (HTTPS) and after a user gesture. Test your application on different browsers to rule out browser-specific quirks.
“No Devices Found” Errors (NotFoundError)
This error occurs when the browser cannot detect an available camera or microphone. Users should verify their devices are connected, turned on, and not disabled in their operating system settings. Check device managers for driver issues.
Developers should use navigator.mediaDevices.enumerateDevices to check if any devices are reported by the browser. Ensure your constraints correctly specify audio: true or video: true for the desired devices.
Camera/Microphone Already in Use (NotReadableError)
If another application is actively using the camera or microphone, you might encounter a NotReadableError. Users should close other applications that might be accessing their devices. This includes video conferencing software or recording tools.
Developers cannot programmatically resolve this, but good error messaging can inform the user. Suggest restarting their browser or computer if the issue persists. Some anti-virus software can also interfere with device access.
Insecure Context Block (Developer Concern)
If your web page is served over HTTP instead of HTTPS, getUserMedia will fail silently or throw a security error. Always deploy or test your application on a secure server. Localhost is usually exempt from this rule for development.
Ensure all embedded content, like iframes, also originates from a secure context. Mixed content (HTTPS page loading HTTP resources) can also cause issues. Migrate all assets to HTTPS for consistency.
FAQ
Why does my browser ask for permission every time I visit a site?
Your browser asks for permission for security and privacy. Some sites may only request temporary access, or you might have chosen “Ask” in your browser settings. To allow persistent access, choose “Allow” and check for an option to remember your decision, or adjust site settings manually.
Can a website access my camera or microphone without showing a prompt?
No, modern browsers are designed to prevent websites from accessing your camera or microphone without your explicit consent. A permission prompt will always appear when a site attempts to use these devices for the first time or if previous permissions were denied.
What if my webcam or microphone isn’t working even after I grant permission?
First, ensure your devices are properly connected and recognized by your operating system. Check if another application is currently using them. You might also need to restart your browser or computer, or check your system’s privacy settings to ensure the browser itself has access to your hardware.
Is it safe to grant camera and microphone access to a website?
It can be safe if the website is reputable and uses HTTPS encryption. Always be cautious and only grant access to sites you trust. Look for the padlock icon in the address bar, indicating a secure connection. Revoke permissions if you no longer trust a site.
How do I reset camera and microphone permissions for a specific website?
You can reset permissions by clicking the padlock icon in your browser’s address bar. This will open a site information panel where you can manage “Camera” and “Microphone” settings, typically allowing you to reset or explicitly block/allow access.
Conclusion
Enabling microphone and webcam access for HTML5 Canvas applications hinges on the browser’s MediaDevices API and the getUserMedia method. Users must grant explicit permissions, typically through a browser prompt, which can be managed in their browser’s site settings. Developers must implement this functionality over a secure HTTPS connection, following user interaction, and always handle errors gracefully while prioritizing user privacy and security.