If your Mac camera isn't showing up, won't turn on, or keeps getting blocked by apps, you're not alone. Most "how to use a webcam on a mac" problems come down to permissions, the wrong camera being selected inside an app, or an external webcam that needs a quick nudge. The good news is that macOS makes this pretty painless once you know where to look.
Whether you've got a built-in FaceTime camera, a USB webcam you just plugged in, or an iPhone ready to do double duty, the right setup depends on your macOS version and what app you want to use. Per Apple's published specifications, the built-in FaceTime HD camera is 720p on most Intel Macs and 1080p on M1 and later models, and Continuity Camera requires macOS 13 Ventura or newer with an iPhone XR or later. Let's figure out which path fits your situation.
Quick Answer
Open the app you want to use, such as Zoom, FaceTime, or QuickTime. macOS will prompt you to grant camera access. If it doesn't, go to System Settings, then Privacy and Security, then Camera. Toggle on the app.
That's the core of how to use a webcam on a Mac.
The Core Problem: Your Mac Camera Isn't Cooperating
Most webcam headaches on a Mac fall into one of three buckets. Either the camera is technically working but an app can't see it, or the camera flat-out isn't detected, or your image quality is bad enough that something is clearly misconfigured. Each one has a different fix.
Here's the rough decision tree we walk readers through:
- Camera works in Photo Booth but not in Zoom → it's a permissions or app-specific camera selection issue.
- Camera doesn't show up anywhere → driver, USB power, or macOS compatibility problem.
- Camera shows up but the image is poor → lighting, resolution, or wrong-device-selected issue.
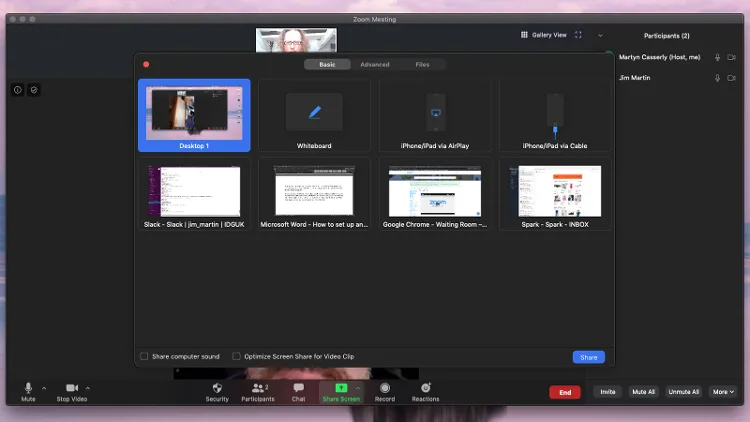
If you're not sure which bucket you're in, the next section helps you narrow it down fast.
Quick Answer: Which Path Are You On?
Before we dig into steps, take 30 seconds to figure out which setup you actually have. The fix is different for each.
| Your situation | Path you want |
|---|---|
| You just want your built-in Mac webcam to work in an app | Built-in camera setup |
| You plugged in a USB webcam and Mac isn't seeing it | External webcam setup |
| You want to use your iPhone as a high-quality webcam | Continuity Camera setup |
| Camera works in one app but not another | Permissions troubleshooting |
| Nothing works at all | macOS-level troubleshooting |
As of 2026, all current macOS versions (Ventura, Sonoma, Sequoia) handle camera permissions in roughly the same place, so the steps below apply across the board. The exact menu wording can differ slightly between versions, but the logic is identical.
Understanding Your Camera Setup: Built-In, External, or Continuity
You've basically got three options on a modern Mac, and each one behaves a little differently. Knowing which one you're using shapes every troubleshooting step that follows.
Built-In FaceTime HD Camera
This is the little camera at the top of your MacBook screen, or above the display on an iMac. Apple has shipped 720p sensors on Intel Macs and 1080p sensors on every M1-and-later model. It requires zero setup. macOS exposes it to any app that has camera permission.
The catch is image quality. Built-in sensors are small, they're fixed-focus, and they struggle in low light. For a quick Zoom call, they're fine.
For streaming or recording, you'll want something better.
External USB Webcam
Any webcam that uses the USB Video Class (UVC) standard works plug-and-play on macOS without needing extra drivers. Most modern webcams from Logitech, Razer, Elgato, and others fall into this category. Common resolutions run from 720p up to 4K, with frame rates of 30fps or 60fps.
The benefit is a meaningfully bigger sensor, better low-light performance, and often a wider field of view. The downside is occasional detection issues, especially with USB hubs or older macOS versions.
Continuity Camera (iPhone as Webcam)
Introduced in macOS Ventura, Continuity Camera lets you mount your iPhone to your Mac and use it as a high-quality webcam wirelessly. Per Apple's documentation, it requires macOS 13 or later and an iPhone XR or newer.
This is hands-down the best option if you already own a recent model. You get the iPhone's superior camera, automatic updates as Apple improves the software, and features like Center Stage, Studio Light, Desk View, and Portrait mode.
Granting Camera Permissions in macOS (The Step Most People Miss)
This is where most people get stuck. macOS gates camera access per app, and if you declined the permission prompt the first time an app asked, the app will silently fail to detect the camera until you flip the switch manually. Apple controls this behavior through the Privacy and Security framework in System Settings.
Here's the exact flow, current as of 2026:
- Click the Apple menu and open System Settings.
- Scroll down to Privacy and Security.
- Click Camera.
- You'll see a list of apps that have requested camera access.
- Toggle the switch on for the app you're trying to use (Zoom, OBS, Chrome, etc.).
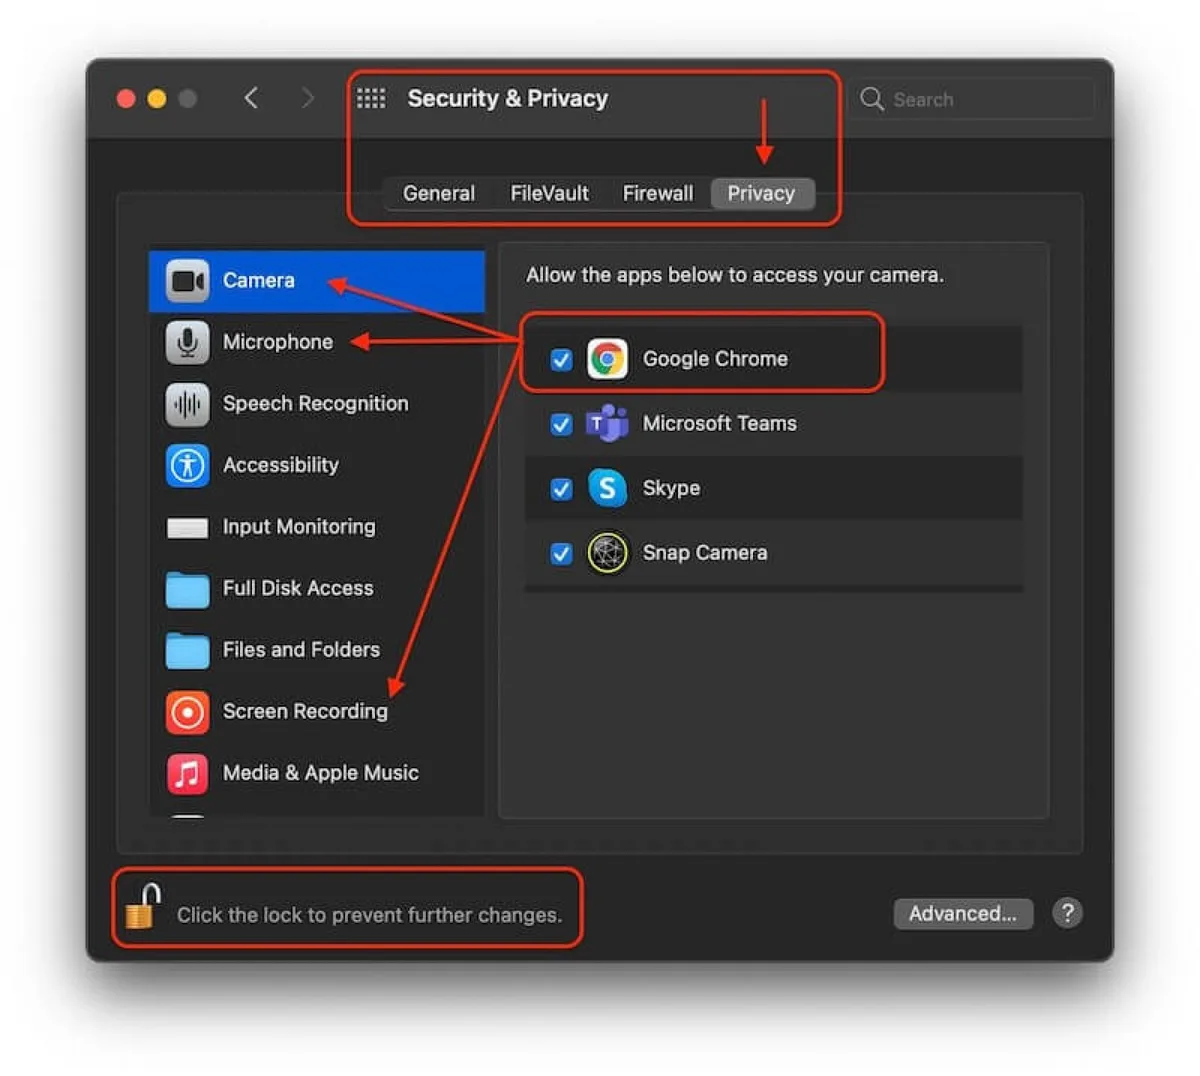
If the app isn't listed at all, that means it hasn't requested access. To trigger the prompt, launch the app and try to use the camera inside it. macOS will pop up a permission dialog. Click Allow.
Quick Permissions Checklist
- Is the app listed under Privacy and Security → Camera? If not, open the app and trigger a camera action.
- Is the toggle green/on? If not, flip it on.
- Did you previously click "Don't Allow"? macOS sometimes remembers that decision. Quit the app, reopen it, and try again.
If the app still can't see the camera after toggling permissions, the issue is almost certainly in the app's own camera selection menu. Most video apps (Zoom, Teams, OBS, Chrome) let you pick which camera they use. We'll cover that in a later section.
For a deeper look at how macOS handles camera privacy indicators and per-app permissions, Apple's official macOS Privacy guide walks through the full framework.
How to Use the Built-In FaceTime HD Camera
The built-in camera is the easiest path because there's literally no hardware setup. You open an app, give it permission, and you're live. The trick is just knowing that nothing else needs to happen on the macOS side.
Here's the simple flow:
- Quit and reopen the app you want to use (this reloads the permission state).
- Open the app and trigger a camera action (start a meeting, open a video preview).
- When macOS prompts for camera access, click Allow.
- If no prompt appears, follow the permissions walkthrough in the previous section.
For most built-in camera users, that's genuinely it. The camera will work in FaceTime, Photo Booth, QuickTime, Zoom, Teams, and any browser-based meeting tool once permissions are granted.
When the Built-In Camera Looks Bad
If the image quality is the issue, not the detection, the fix is almost always environmental. Built-in laptop cameras have tiny sensors that hate backlight. Sit facing a window or a lamp, not with one behind you.
Raise your screen so the camera is roughly at eye height. If your Mac supports it (M1 and later), the camera is 1080p, which is plenty for calls but won't compete with even a mid-tier external webcam in dim rooms.
How to Set Up an External USB Webcam on Mac
External webcams are mostly plug-and-play on modern macOS. As long as the webcam supports the USB Video Class (UVC) standard, the Mac detects it without needing extra drivers. Manufacturer-specific software (like Logi Tune for Logitech webcams) is optional and usually just unlocks extra settings.
Here's the setup flow:
- Plug the webcam into a USB-C or USB-A port directly on your Mac (avoid hubs for first-time setup).
- Wait 5 to 10 seconds for macOS to enumerate the device.
- Open Photo Booth or QuickTime to confirm the webcam shows up as a selectable camera.
- Open your target app and pick the new webcam from its video settings.
- If the webcam came with a control app (Logi Tune, Razer Synapse), install it if you want to tweak zoom, exposure, or field of view.
If Mac Isn't Seeing the Webcam
A few common culprits:
- USB hub power issues. Some bus-powered hubs can't supply enough power. Plug directly into the Mac.
- Outdated macOS. Apple has fixed webcam detection bugs in point releases. Make sure you're on the latest macOS your Mac supports.
- Faulty cable or port. Try a different USB port. Try a different cable if the webcam has a detachable one.
- Conflicting software. Close any camera control apps from the previous webcam you used. They sometimes hold onto the device.
| Resolution | Frame rate | Best for |
|---|---|---|
| 720p | 30fps | Casual calls, low bandwidth |
| 1080p | 30fps | Most professional video calls |
| 1080p | 60fps | Streaming, gaming, fast motion |
| 4K | 30fps | Recording, content creation |
Most external webcams default to 1080p/30fps, which is the sweet spot for the majority of users.
How to Use Your iPhone as a Webcam with Continuity Camera
Continuity Camera is the best-kept secret on macOS. Your iPhone has a far superior sensor to any MacBook webcam, and Apple built native support for using it wirelessly as your Mac's camera. Per Apple's published system requirements, you need macOS 13 Ventura or later and an iPhone XR or later.
Setup Steps
- Sign in to the same Apple ID on both your Mac and iPhone.
- Make sure Bluetooth and Wi-Fi are enabled on both devices.
- Mount your iPhone above your Mac display using a compatible Continuity Camera mount (most attach magnetically to your MacBook lid).
- Open any video app on your Mac. The iPhone should appear as a selectable camera labeled "Continuity Camera" or your iPhone's name.
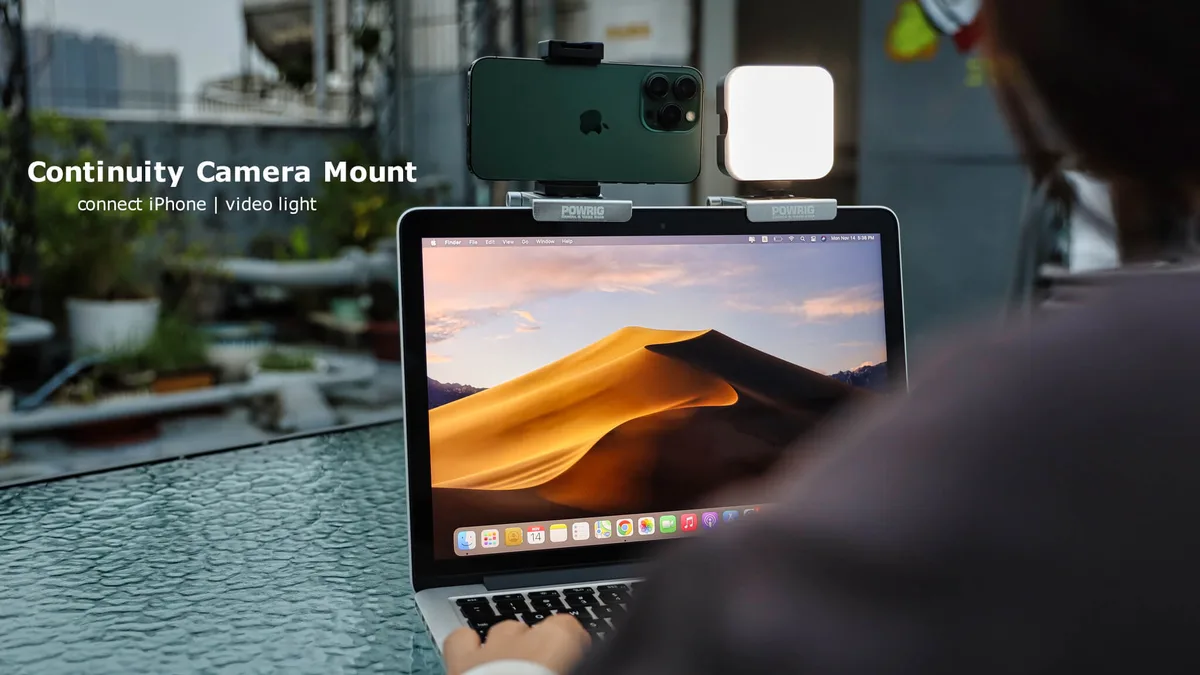
- Pick it from the app's video settings.
What You Get Beyond Basic Webcam Quality
Continuity Camera unlocks features the built-in Mac webcam can't touch:
- Center Stage: auto-frames you as you move around.
- Studio Light: brightens your face while dimming the background.
- Portrait Mode: blurs the background for a clean bokeh effect.
- Desk View: uses the iPhone's ultra-wide lens to show your desk top-down.
- Studio Display-style features on newer iPhones: reactions and presenter overlay.
For creators, remote teachers, and people who live in video calls, Continuity Camera is a free, genuinely meaningful upgrade.
Choosing the Right Camera Inside an App (Zoom, OBS, FaceTime, QuickTime)
Even after macOS permissions are sorted, every app picks its own camera independently. If your image is blank or showing the wrong device, you almost always need to dig one menu layer deeper into the app itself.
Where to Find It in Common Apps
| App | Where to pick the camera |
|---|---|
| Zoom | Settings → Video → Camera |
| Microsoft Teams | Settings → Devices → Camera |
| Google Meet | Settings (three dots) → Video → Camera |
| FaceTime | Video menu → Camera |
| QuickTime Player | File → New Movie Recording → arrow next to record button |
| Photo Booth | Camera menu (built-in only for testing) |
| OBS Studio | Sources → Video Capture Device → Device dropdown |
If your image still doesn't show up after picking the right camera, restart the app. Some apps cache the camera list on launch and won't refresh until you reopen them.
Testing Your Webcam with Photo Booth and QuickTime
Before you troubleshoot inside a meeting app, test the camera in something simple. Photo Booth and QuickTime Player are built into every Mac and use the exact same camera permission system as third-party apps, so they're a clean way to confirm whether macOS itself can see your camera.
Photo Booth Test
Open Photo Booth from Launchpad or Spotlight. If the camera works, you'll see a live preview immediately. If Photo Booth says "There is no connected camera," macOS isn't detecting your webcam at all.
That points to a hardware or driver issue, not a permissions issue.
QuickTime Test
Open QuickTime Player, then choose File → New Movie Recording. Click the small arrow next to the red record button to pick which camera and microphone QuickTime uses. This is also the fastest way to verify your external webcam's microphone is working, not just the video feed.
If both apps show your camera but your meeting app doesn't, the problem is in that app's settings, not your Mac. We've covered how to fix that in the previous section.
Troubleshooting: Why Your Mac Webcam Isn't Working
If you've made it this far and the camera still isn't cooperating, run through this checklist in order. It catches about 90% of the edge cases we see in aggregate user feedback.
- Reboot your Mac. Camera drivers get stale. A restart reloads them.
- Test in Photo Booth. If it fails here, the issue is macOS-level, not app-level.
- Check macOS is up to date. Apple ships webcam fixes in point releases fairly often.
- Try a different USB port. Especially with external webcams.
- Reset the camera process. Open Terminal and run
sudo killall VDCAssistant. This forces macOS to relaunch its camera daemon. - Check for conflicts. Quit other apps that might be holding the camera (Zoom, OBS, Photo Booth all lock the device when open).
When to Suspect Hardware Failure
If Photo Booth shows no camera and you've rebooted, reset VDCAssistant, and tried multiple USB ports with multiple webcams, you're likely looking at a logic board or sensor hardware issue. On MacBooks, the camera cable runs through the display hinge and can fail after years of opening and closing. Apple Store diagnostics or an Apple Authorized Service Provider can confirm.
Fixing Privacy and Permission Issues
If your camera works in QuickTime but not in your meeting app, the app's privacy entry is the first thing to check. Quit the app, open System Settings → Privacy and Security → Camera, toggle the app off and back on, then reopen the app. If the app isn't listed at all, it hasn't requested access.
Launch it, trigger a camera action, and click Allow when prompted.
Fixing Detection Issues with External Webcams
If Photo Booth can't see your external webcam, the camera itself isn't enumerating on macOS. Unplug it, plug it directly into a different USB port (not a hub), wait 10 seconds, and reopen Photo Booth. If it still fails, reboot your Mac with the webcam plugged in, and confirm the device supports UVC.
If the webcam ships with its own driver, install it from the manufacturer's site.
Fixing Continuity Camera Pairing Problems
Continuity Camera failures almost always trace back to Apple ID mismatch, Bluetooth/Wi-Fi being off on one device, or Low Power Mode on the iPhone. Sign both into the same Apple ID, toggle Bluetooth and Wi-Fi off and back on, disable Low Power Mode, and bring the iPhone within a few feet of the Mac. If still no luck, reboot both devices.
Improving Video Quality: Settings, Lighting, and Resolution
Most "bad webcam" problems are lighting problems. A cheap 1080p webcam in good light looks better than a 4K webcam in a dim room. Start with the environment, then the settings.
Lighting First
- Face a window or a soft light source.
- Avoid overhead fluorescents that cast harsh shadows under your eyes.
- A simple ring light or desk lamp behind your monitor at eye height is the single biggest upgrade you can make.
Software Settings Worth Tweaking
| Setting | What it does | Where to find it |
|---|---|---|
| Resolution | Higher = sharper but more CPU load | OBS: Settings → Video |
| Frame rate | 30fps for calls, 60fps for motion | OBS: Settings → Video |
| Exposure | Brightens or darkens the image | Webcam manufacturer app |
| White balance | Removes color cast | Webcam manufacturer app |
| Field of view | Wider shows more background | Zoom/Teams/OBS video settings |
Bandwidth Matters More Than Resolution
Even a perfect 1080p webcam looks terrible on a 1 Mbps upload connection. Aggregate video conferencing research suggests aiming for at least 1.5 Mbps upload for stable 720p calls and 3 Mbps upload for 1080p. If your network is shaky, drop your resolution to 720p and let the camera deliver a smoother, sharper-looking image instead.
Common Mistakes Mac Users Make With Webcams
A few patterns come up over and over in user troubleshooting reports. Skipping these saves you a lot of head-scratching.
- Assuming "Allow Once" is permanent. macOS sometimes grants temporary access that expires. Re-check Privacy and Security → Camera.
- Leaving an old meeting app open in the background. It can hold the camera lock and block other apps.
- Plugging a USB webcam into a low-power hub. Detection fails silently. Use a direct port.
- Forgetting to switch the camera inside the app. macOS-level permissions are granted, but the app is still using "FaceTime HD Camera" by default.
- Declining the permissions popup once and forgetting. macOS remembers. Re-trigger the prompt by reinstalling the app or resetting its privacy entry.
Best Webcam Setup by Use Case
Different people need different things from their Mac camera. Here's the setup that makes the most sense for each common scenario, based on what aggregate reviews and manufacturer specs suggest.
Remote Workers on Daily Video Calls
Built-in Mac webcam for portability, or a mid-tier 1080p external webcam at a fixed desk. Lighting matters more than the webcam itself.
Streamers and Content Creators
A 1080p/60fps or 4K external webcam, mounted on a tripod with a separate USB or XLR microphone. OBS Studio handles the capture, scene switching, and recording.
Online Teachers and Tutors
Continuity Camera with an iPhone gives you Center Stage and Desk View, which are genuinely useful for showing a notebook or desk workspace without leaving the call.
Job Interviewees
Built-in is fine if your lighting is solid. Use Photo Booth to test the framing and background before the call.
Telehealth Users
Continuity Camera offers the cleanest image with the least setup. Pair it with a wired ethernet connection if your Wi-Fi is unreliable.
Expert Tips From People Who Use Mac Webcams Daily
A few small habits separate a "fine" webcam setup from one that looks professional.
- Eye-level framing is non-negotiable. Stack books under your laptop or use a stand.
- Background matters as much as the camera. A cluttered wall pulls attention. A clean wall, a plant, or a subtle bookshelf reads as professional.
- Eye contact is a camera position trick. Look at the webcam, not the screen. Place a sticker near the camera as a reminder.
- Wired ethernet beats Wi-Fi for video calls. No contention with other devices, no random drops.
- Close every app that doesn't need to be open. Each one is a potential camera hog or background CPU drain.
- Reboot before a big call. It clears stuck processes, refreshes the camera daemon, and resets network stacks. Five minutes of prevention beats ten minutes of mid-call troubleshooting.
For a deeper reference on macOS-level camera behavior and the underlying AVFoundation framework that apps use to access the camera, Apple's developer documentation is the canonical source for how macOS exposes camera devices to apps.
Final Recommendation: Which Webcam Setup Should You Choose?
For most Mac users in 2026, the answer is simple: use Continuity Camera with a recent iPhone if you have one, a 1080p external UVC webcam if you don't, and the built-in FaceTime HD camera only when portability matters more than image quality. Grant permissions once, pick the right camera inside each app, and you're set.
Frequently Asked Questions
Why does my Mac say "no camera available"?
It usually means macOS isn't detecting the webcam at all. For built-in cameras, that points to a system-level issue, often a stuck camera daemon. Run sudo killall VDCAssistant in Terminal and reboot.
For external webcams, it usually means a USB power or driver issue. Try a different port and confirm the webcam supports UVC.
How do I flip or mirror my camera on Mac?
Most apps (Zoom, OBS, Photo Booth) have a "mirror my video" toggle in their video settings. macOS itself does not mirror the camera output by default, so the app you use controls this. In OBS, right-click the video source and pick Transform → Flip Horizontal.
Can two apps use the Mac webcam at the same time?
No. macOS only allows one app to access the camera at a time. If Zoom is running, QuickTime and Photo Booth will both show a black image or no device. Quit the first app before opening the second.
Does macOS show when the camera is on?
Yes. On Apple silicon Macs and newer Intel models, a small green dot appears in the menu bar whenever the camera is active. On older MacBooks with a physical camera, the green LED next to the lens turns on.
If neither indicator lights up when you expect the camera to be active, the app isn't actually accessing the camera, even if the app UI claims it is.
Do all USB webcams work with Mac?
Most modern webcams do, because they comply with the USB Video Class (UVC) standard. macOS supports UVC natively, so no driver install is needed. A handful of older or specialized webcams require proprietary drivers, and those sometimes don't ship a macOS version. Check the manufacturer's website before buying if you're unsure.
Why is my Mac webcam blurry?
A few common causes: low light forcing the sensor to crank up noise reduction, a dirty lens, wrong focus (some external webcams need manual focus), or the wrong camera selected in the app. Wipe the lens with a microfiber cloth, add light to the room, and confirm the app is using the webcam you expect.
How do I disable the webcam entirely on Mac?
For the built-in camera, no single setting kills it, but you can revoke camera access for every app in System Settings → Privacy and Security → Camera. For external webcams, just unplug it. For an extra layer of security, a sliding webcam cover on MacBooks physically blocks the sensor, which is the only truly bulletproof option against malware that might bypass software-level blocks.
Why does Continuity Camera keep disconnecting?
The most common cause is that your iPhone is dozing or switching networks. Keep both devices on the same Wi-Fi network, keep Bluetooth on, and disable Low Power Mode on the iPhone. If your Mac is connected to ethernet and your iPhone to cellular, Continuity Camera can fail to pair reliably.
Can I use my iPhone as a webcam without Wi-Fi?
Yes. Continuity Camera uses Bluetooth for the initial handshake and a peer-to-peer Wi-Fi connection for the video stream, not your home Wi-Fi network. As long as both Bluetooth and Wi-Fi are enabled on both devices, it works without a router.
Why does Zoom say "cannot find camera" even though it works elsewhere?
It almost always means Zoom lost its camera permission or is trying to use a different device than you think. Quit Zoom completely, reopen System Settings → Privacy and Security → Camera, toggle Zoom off and back on, then reopen Zoom and reselect your camera in Settings → Video.
How do I record my Mac webcam with audio?
QuickTime Player handles this without any extra software. Open QuickTime, choose File → New Movie Recording, pick your camera and microphone from the dropdown next to the record button, then hit record. For more control over resolution, frame rate, and audio routing, OBS Studio is the free, go-to option and exports to MP4 or MKV.
What is the best webcam for Mac in 2026?
The "best" depends on your budget and use case, but the consistently top-rated options in aggregate reviews are external 1080p/60fps webcams from established brands like Logitech, Razer, and Elgato. For most people, however, Continuity Camera with an iPhone 14 or newer produces image quality that rivals or beats dedicated webcams in the same price range, and it's already in your pocket.
Does restarting VDCAssistant actually fix camera problems?
Sometimes, yes. VDCAssistant is the macOS daemon that manages camera access. If it gets stuck, no app can reach the camera even when permissions are correct.
Running sudo killall VDCAssistant in Terminal forces macOS to relaunch it. This is a well-documented troubleshooting step that resolves a meaningful percentage of "camera not detected" issues, especially after macOS updates.