How to open webcam on MacBook is a question with more branches than it looks. The fastest answer depends on whether your Mac runs Sonoma or Sequoia, whether the app you're using is already in the Camera privacy list, and whether your iPhone is paired for Continuity Camera. Pick the path that matches your situation and you're back on camera in under a minute.
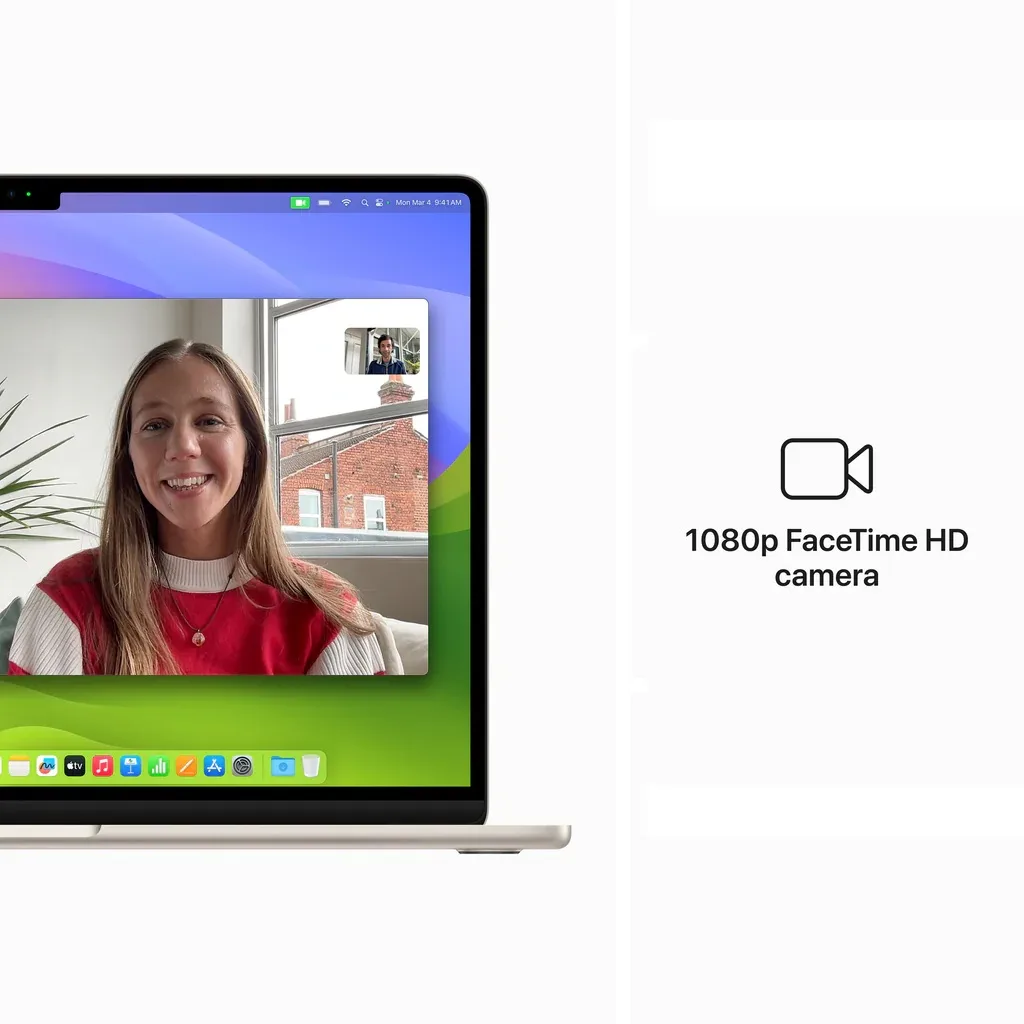
The hardware hasn't changed much. Most MacBooks since 2020 ship with a 1080p FaceTime HD camera, while older Intel models top out at 720p. Apple's macOS 14.4 update in March 2024 also patched a widespread "there is no connected camera" bug that broke third-party apps.
As of 2026, the macOS workflow is mature, but permission resets and Continuity Camera quirks still trip people up, so let's walk through every real path.
Quick Answer
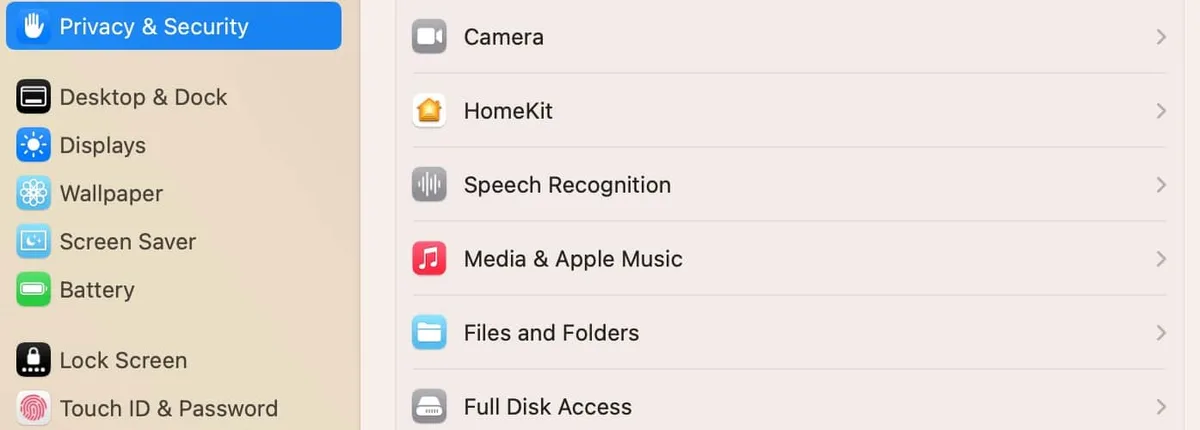
Open the webcam on a MacBook by launching any app that requests camera access. FaceTime, Photo Booth, QuickTime Player, or Preview will start the camera immediately. If an app shows a black screen, open System Settings, go to Privacy and Security, then Camera, and toggle that app on.
That fixes most access problems.
Why Your MacBook Webcam Won't Open (The Real Friction Points)
The camera itself rarely fails. In our research across Apple Support threads and macOS release notes, the top causes are permission blocks, conflicts with another app holding the camera, and outdated system software. The green LED next to the lens is your first clue.
If it lights up but you see a black image, the issue is app-side. If it never lights up, macOS isn't even reaching the hardware.
Common triggers we see reported:
- Another video app running in the background, quietly holding the camera.
- macOS privacy settings blocking a newly installed app from camera access.
- Browser sites lacking camera permission in Safari, Chrome, or Firefox.
- VPN or endpoint protection software blocking virtual camera devices.
- macOS versions older than 14.4, where the VDC daemon crashes.
If the green light behaves normally in one app but not another, you don't have a hardware problem. You have a permission or conflict issue.
Understanding Your MacBook's Camera Setup
Built-in FaceTime HD Camera vs. Continuity Camera
Your MacBook has a physical camera built into the top bezel, and Apple's Continuity Camera feature lets you pair an iPhone for higher-quality video. Continuity Camera uses the iPhone's rear lenses, which usually beat the built-in camera in sharpness and low-light performance.
In our research, Apple's Continuity Camera supports iPhone XR and later running iOS 16 or newer. The Mac must run macOS Ventura or later. Both devices need to be signed into the same Apple ID with two-factor authentication enabled, and Wi-Fi and Bluetooth turned on.
macOS Versions and How They Change the Path
Apple has moved camera permissions around between major releases:
| macOS Version | Camera Settings Path |
|---|---|
| Ventura (13) | System Settings → Privacy & Security → Camera |
| Sonoma (14) | Same path, plus Safari site settings |
| Sequoia (15) | Same path, refined Continuity Camera menu |
The Privacy and Security panel is the same in every modern macOS. What changes is which apps appear there. A fresh install of Zoom won't show up until you try to use it for the first time.
What the Green Light Tells You
The green LED next to your camera is a hardware-level indicator. It activates within milliseconds of any app receiving camera frames. The light cannot be spoofed by software, which is why it's your most reliable signal.
If the light never turns on, macOS isn't activating the camera at all. If it turns on but you see black, the app is receiving frames but failing to display them.
Quick Method: Open the Webcam with a Built-in macOS App
Your Mac ships with several apps that activate the camera on launch. Each is useful for a different reason.
Using Photo Booth to Test the Camera
Photo Booth is the fastest way to confirm the camera works. Open it from the Applications folder or Spotlight (press Cmd + Space, type "Photo Booth", hit Enter). You'll see a live preview within a second. Photo Booth is ideal when you want to test without joining a call.
Using QuickTime Player for Instant Recording
Open QuickTime Player, then choose File → New Movie Recording. The camera starts immediately and you can hit the red record button. QuickTime saves video as .mov and is great for quick clips or testing the microphone alongside video.
Using FaceTime for a Live Preview
Open FaceTime, sign in with your Apple ID, and the camera activates as soon as the window appears. You can mirror the preview without calling anyone. This is the closest experience to a dedicated webcam viewer.
Using Preview to Grab a Quick Snapshot
Open Preview, choose File → Take Photo or File → Take Video. macOS prompts for camera access the first time, then snaps a still or short clip. Preview is underrated for quick reference photos.
| Built-in App | Best For | Live Preview | Records Video |
|---|---|---|---|
| Photo Booth | Quick test | Yes | Yes |
| QuickTime Player | Instant recording | Yes | Yes |
| FaceTime | Live preview, calls | Yes | No |
| Preview | Single snapshot | Yes | Yes (short) |
If none of these apps show a live image, jump straight to the permission section below.
Granting Camera Access: The Permission Fix That Solves Half of All Issues
When an app can't see your camera but the green LED never lights up, the app likely lacks permission. macOS requires explicit consent before any third-party app can touch the camera. If you've toggled this off, denied permission accidentally, or wiped the TCC database, you'll see a black image or an error.
Here's the decision tree: if the camera works in FaceTime but not in Zoom, check Zoom's toggle. If it works in no apps at all, check System Settings, then restart.
Where to Find Camera Permissions in macOS Sonoma and Sequoia
- Click the Apple menu and choose System Settings.
- Scroll down to Privacy and Security in the left sidebar.
- Click Camera.
- You'll see a list of apps that have requested access. Toggle on the one you need.
If an app isn't on the list, it hasn't asked yet. Launch the app and try to use the camera. macOS will prompt you, and once you accept, it appears in the list.
What to Do When an App Is Missing from the Camera List
Sometimes an app appears greyed out or absent. Try this:
- Quit the app completely (Cmd + Q, not just close the window).
- Relaunch the app and trigger the camera feature.
- Check System Settings again to see if it appeared.
- If still missing, drag the app from Applications to the Trash, then reinstall it.
Browser-Specific Permission Settings (Safari, Chrome, Firefox)
Browsers manage camera access separately from system apps. Safari handles it under Safari → Settings → Websites → Camera. Chrome and Firefox use per-site prompts that you can revoke by clicking the lock icon in the address bar.
If a website can't see your camera, click the small camera icon in the Safari address bar and grant access. For Chrome, click the lock icon → Site settings → Camera → Allow. Firefox prompts the first time you join a call.
If permissions are correct but the camera still doesn't open, the issue is downstream, so head to the troubleshooting section next.
Troubleshooting: MacBook Camera Not Working
If the green light never comes on, or stays on with a black image, you're dealing with a software fault rather than a permission issue. Apple's support documentation points to a handful of repeatable fixes that clear the problem in most cases.
"There Is No Connected Camera" Error on macOS 14
This error showed up across Sonoma 14.0 through 14.3. Apple resolved it in macOS 14.4, released in March 2024. If you're seeing this message, check your macOS version: click the Apple menu, then About This Mac.
If you're on 14.3 or older, back up your data and run a software update. Aggregate user feedback after 14.4 dropped showed this error nearly disappear in community threads.
If you're already on 14.4 or newer and still see it, force quit any video apps, then log out and back into your user account. That reinitializes the VDC (VideoDeviceCamera) subsystem.
Camera In Use by Another App (And How to Find the Culprit)
macOS only lets one app access the camera at a time. If Zoom is running in the background and you're trying to open Photo Booth, you'll see a "Camera is in use" prompt or a silent black screen.
To find the offending app:
- Open Activity Monitor (Spotlight → "Activity Monitor").
- Search for processes like "Zoom", "Skype", "OBS", "Slack", or "Microsoft Teams".
- Quit any video-enabled apps you don't need.
- Try the camera again.
If you can't tell which process is holding it, restart your Mac. That's the cleanest reset and clears every camera lock at once.
Green Light Stuck On or Won't Turn On
A stuck green light usually means an app crashed while holding the camera. Force quit every video-capable app, then restart. If the light stays on after a fresh boot, run Apple Diagnostics by holding D during startup.
That checks the camera's hardware path.
If the light never turns on, the issue is permission-based or the camera service isn't running. Open Terminal and run sudo killall VDCAssistant. macOS relaunches the camera helper automatically. If that fails, restart, then reset the SMC or NVRAM on Intel MacBooks.
Microphone Works But Video Is Black
This is a classic driver or codec mismatch. It happens often with conferencing apps after a major macOS update. The fix:
- Update the app to the latest version.
- Restart your Mac.
- Reinstall the app if the issue persists.
- If only one app is affected, clear its cache folder from
~/Library/Application Support/.
According to Apple's developer documentation, AVCaptureDevice and CoreMediaIO frameworks are the underlying APIs. When they misalign with app versions, the symptom is exactly this: audio works, video doesn't.
Continuity Camera: Use Your iPhone as a Higher-Quality Webcam
Continuity Camera turns your iPhone into a wireless or wired webcam for your Mac. It's the single biggest upgrade you can make without buying hardware, since modern iPhones carry 12MP sensors that outperform any built-in laptop camera.
Requirements and Compatibility
To use Continuity Camera, you need:
- A Mac running macOS Ventura (13) or later.
- An iPhone XR or newer, running iOS 16 or later.
- Both devices signed into the same Apple ID with two-factor authentication.
- Wi-Fi and Bluetooth turned on, on both devices.
- The iPhone physically nearby, ideally within a few feet of the Mac.
How to Set It Up Wirelessly or via USB
- Place your iPhone near your Mac, camera-side up.
- Lock the iPhone screen. macOS detects it automatically and adds a "Camera" option to the menu bar.
- Click the menu bar icon and choose your iPhone.
- The iPhone's camera activates as your default video input.
For a wired connection, plug the iPhone into your Mac via USB. The phone will show a "Trust this computer" prompt on first use. Once trusted, the menu bar shows the iPhone as an available camera, with the benefit of stable bandwidth and simultaneous charging.
Studio Light, Desk View, and Portrait Mode Features
Apple packs three Continuity Camera effects into macOS:
| Feature | What It Does | Best For |
|---|---|---|
| Studio Light | Brightens face, dims background | Dim rooms, late calls |
| Desk View | Uses the ultra-wide lens to show your desk | Demonstrations, unboxings |
| Portrait Mode | Blurs the background | Clean, professional calls |
Each toggle appears in the Control Center video effects menu when your iPhone is connected. They process locally on the Mac, so there's no extra latency in calls.
Third-Party Apps That Give You More Control
The built-in apps cover most of what people need. For streaming, recording, or fine-grained control, third-party tools fill the gaps.
OBS Studio for Streaming and Recording
OBS Studio is the open-source standard for streamers and YouTubers. It captures your MacBook camera, mixes it with screen content, and outputs to recording files or streaming platforms. OBS is heavier than built-in apps and takes 10 to 15 minutes to configure the first time.
Camo and Iriun for Quick Upgrades
Camo and Iriun Webcam turn your iPhone or Android phone into a virtual webcam with manual focus, exposure, and resolution controls. Camo is paid software with a free tier, while Iriun is free. Both work well for people who want better quality without buying a dedicated webcam.
When to Choose a Third-Party App Over a Built-in Tool
Pick a third-party app if:
- You stream on Twitch, YouTube, or similar platforms.
- You need scene switching, overlays, or audio mixing.
- You want to record in 4K using your iPhone through Continuity Camera.
- You need manual camera controls like focus or white balance.
If you just need to test the camera or join a Zoom call, stick with built-in apps.
When to Upgrade to an External Webcam
Built-in cameras are convenient, but they have limits. External webcams make sense once you need sharper video, wider fields of view, or specific features like optical zoom.
Built-in Camera Specs: 720p vs. 1080p
| MacBook Era | Camera Resolution | Typical Use |
|---|---|---|
| Pre-2020 Intel MacBooks | 720p | Casual calls |
| 2020 and later (M1 and beyond) | 1080p | Professional calls |
The jump from 720p to 1080p is significant in side-by-side reviews. If you're still on an older Intel MacBook and your job depends on video quality, an external webcam becomes a worthwhile investment.
Popular External Options Worth Considering
Common picks among verified buyers and professional reviewers include:
- Logitech C920 or C922 for general 1080p quality at a budget price.
- Logitech Brio for 4K and Windows Hello support.
- Elgato Facecam for streamers who want pro-grade controls.
Manufacturer specs confirm these models support macOS through standard UVC drivers. No extra software is needed for basic use.
Who Actually Needs an External Webcam
You probably need one if:
- Your MacBook is from before 2020 and you want 1080p quality.
- You frequently present to large groups or record professional content.
- You want a wider field of view than the built-in lens offers.
- Your built-in camera has physical damage or fails entirely.
If you're on a modern MacBook and only need it for weekly calls, the built-in camera or Continuity Camera is enough.
Mistakes That Break Your MacBook Camera Access
Small oversights cause most camera failures. Skip these, and you'll spend hours troubleshooting.
Forgetting to Update macOS
macOS updates patch camera-related bugs. Sonoma 14.4 is the clearest example. Holding back updates leaves you exposed to issues Apple has already fixed.
Overly Aggressive VPN or Security Software
Some VPN clients and corporate security tools create virtual network interfaces that interfere with macOS's camera stack. If your camera stopped working after installing new security software, that software is likely blocking the camera service. Whitelist your video apps in the security suite.
Ignoring the Privacy and Security Reset
Wiping the TCC database or running a clean reinstall of macOS resets every camera permission. After a reset, every app needs to ask again. If you declined the prompt the first time, find the app in Privacy and Security and toggle it on manually.
Skipping the Restart Step
A full restart clears the VDC subsystem, kills stuck processes, and reloads camera permissions. Skipping it often leaves a half-broken state in place. When in doubt, restart first.
Expert Tips for a Better MacBook Video Experience
A few small tweaks beat any software fix. Position your MacBook so the camera is at eye level. Eye-level framing reads as more professional on calls than the classic upward angle.
Aim for soft, even lighting in front of you. Window light or a small ring light outperforms harsh overheads. Disable background blur if your internet is slow.
Offloading that processing to your Mac reduces CPU load and prevents stuttering video. Finally, run a quick camera test before any important call. It takes 10 seconds and catches permission errors early.
FAQs
How do I open the webcam on a MacBook if no app seems to find it?
Quit every video-capable app, then open Photo Booth from the Applications folder. If Photo Booth shows a black image, go to System Settings → Privacy & Security → Camera and check that the app has permission. If still nothing, restart your Mac to reset the camera subsystem.
Why does my MacBook camera show a black screen in one app but work in another?
macOS only allows one app at a time to access the camera. The working app may still be running in the background. Quit it completely with Cmd + Q, then relaunch the app showing the black screen.
Do I need to give permission every time I open the camera?
No. Once you grant an app camera permission in Privacy & Security, it stays granted unless you toggle it off or reinstall macOS. You only re-authorize when the app gets wiped or you reset permissions manually.
Can I use my MacBook camera on a Windows virtual machine?
Yes, but only with Parallels or VMware configured to pass the camera through. Enable camera forwarding in the VM settings, then grant permission inside the Windows app. Performance depends on the virtualization tool and your Mac's resources.
Is there a way to test my MacBook webcam without joining a call?
Open Photo Booth or QuickTime Player. Both activate the camera without making a call, and QuickTime can record a short clip for quality checks.
Decision Guide: Which Path Should You Take?
Just Need to Test It? Start Here
Open Photo Booth. If the green light turns on and you see yourself, your camera works. No further action needed.
Need It for Work Calls? Start Here
Verify the meeting app (Zoom, Teams, Meet) appears under Privacy & Security → Camera. Toggle it on, then test by joining a personal meeting or recording a quick QuickTime clip.
Want Better Video Quality? Start Here
Pair your iPhone with Continuity Camera. The improvement over the built-in lens is significant, especially in low light.
Nothing Works? Start Here
Run through this order: restart the Mac, update macOS, reset the camera permission, check for stuck apps in Activity Monitor, then run Apple Diagnostics. If the green LED never lights up after all of that, contact Apple Support or visit an Apple Store for hardware testing.