Most Mac users hit the same wall: the camera app won't open, the video stays black, or Zoom keeps showing a "no camera available" warning. Learning how to use webcam on a Mac actually comes down to three quick checks: confirm your macOS version, grant camera permission to the app you're using, and pick the right camera source inside that app.
That last step trips people up the most. Apple's macOS treats camera access as a strict permission, so even a perfectly good webcam stays dark until macOS sees it and approves the app. Apple's Privacy & Security framework controls which apps can access the FaceTime HD camera, and Apple added Continuity Camera support starting with macOS Ventura (macOS 13).
As of 2026, the current releases are macOS Sequoia and the macOS Tahoe 26 line, which still use the same Privacy panel structure.
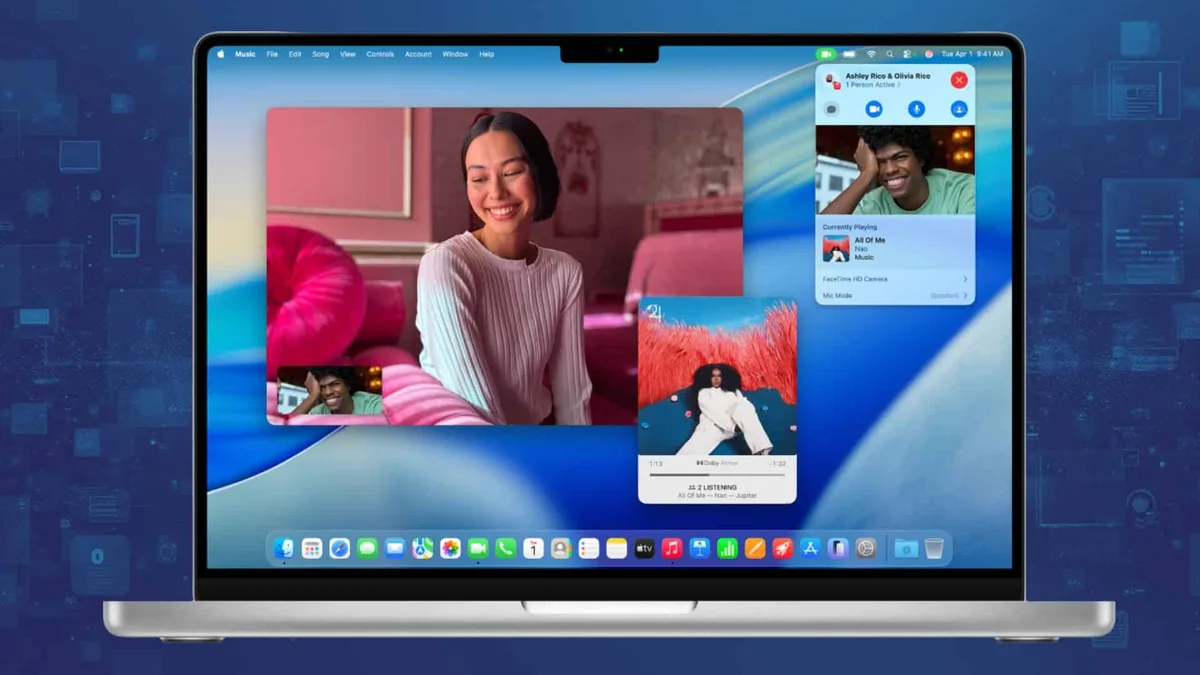
Quick Answer
Your Mac's webcam is ready to use once two things are true. Grant the app camera access in System Settings, then pick the correct camera inside that app's video settings. For the built-in FaceTime camera, open FaceTime, Photo Booth, or your meeting app and the camera turns on automatically once permission is granted.
Built-In FaceTime Camera vs. External Webcam vs. Continuity Camera
Before you troubleshoot anything, pick the route that fits your setup. Mac users really have three webcam options, and each one behaves differently in macOS.
| Option | Best For | Resolution | Needs Setup? |
|---|---|---|---|
| Built-in FaceTime camera | Casual calls, quick meetings | 720p on most models | No, just grant permission |
| External USB webcam | Streaming, recording, better image | 1080p to 4K | Plug in, may need a driver |
| Continuity Camera (iPhone) | Best quality on a MacBook | Up to 1080p | Sign both devices into the same Apple ID |
If you mostly take Zoom calls or talk to family, the built-in camera is fine. If you stream, record YouTube videos, or want a sharper picture, an external webcam or Continuity Camera gives you a noticeable jump in quality.
Check Your macOS Version First, Because It Changes Everything
The exact steps for enabling your webcam shift depending on which macOS you're running. macOS Ventura and later use the redesigned System Settings app, and older macOS Monterey and earlier use System Preferences. Apple also renamed several menu paths in Sequoia.
Quick way to check: click the Apple menu in the top-left corner, then choose "About This Mac." Your macOS name and version appear right under the name of your Mac.
| macOS Version | Year Released | Settings App | Camera Panel Location |
|---|---|---|---|
| Sequoia (15) | 2024 | System Settings | Privacy and Security > Camera |
| Sonoma (14) | 2023 | System Settings | Privacy and Security > Camera |
| Ventura (13) | 2022 | System Settings | Privacy and Security > Camera |
| Monterey (12) | 2021 | System Preferences | Security and Privacy > Camera |
If you're on Sonoma 14.4 or newer, there's an extra wrinkle: Apple started blocking legacy third-party webcam drivers by default. Most modern webcams from Logitech, Elgato, and Razer use standard UVC drivers and aren't affected, but older or niche cameras can stop working on Sonoma 14.4+. Apple documents the change in its macOS Sonoma 14.4 release notes.
Grant Camera Access in System Settings (Privacy and Security)
This is the step most people skip, and it's the reason their camera shows up as "not available." macOS forces every app to ask permission before it touches the camera, and many apps quietly fail instead of asking again.
Here's the path on macOS Ventura, Sonoma, and Sequoia:
- Open System Settings from the Apple menu or the Dock.
- Click Privacy and Security in the left sidebar.
- Scroll down and click Camera.
- Toggle on the apps you want to allow (Zoom, Teams, FaceTime, OBS, etc.).
- Quit the app completely and reopen it.
If you don't see the app listed, it has never asked for camera access yet. Open the app first, then return to this panel and toggle it on. macOS only adds an app to this list after the app makes its first request.
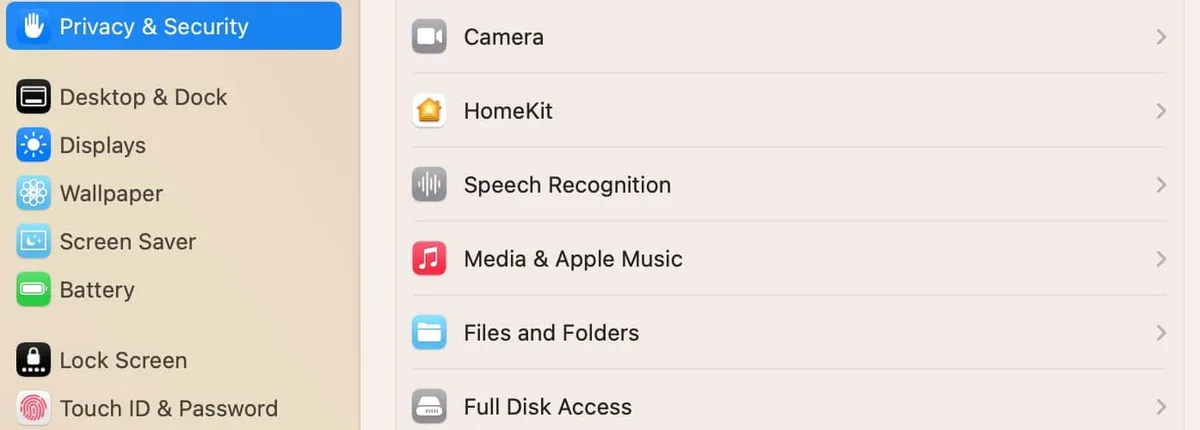
On macOS Monterey or earlier, the path looks like this:
- Open System Preferences.
- Click Security and Privacy.
- Click the Camera tab.
- Tick the box for each app that needs the camera.
- Click the lock icon and enter your password to save changes.
One common gotcha: if you deny permission once, macOS may not prompt again on the next launch. Go back into the panel and flip the toggle manually, since the system won't ask a second time on its own.
How to Use the Built-In Webcam on a Mac
The built-in FaceTime camera is the easiest webcam to use, because macOS already knows it's there. You just need to open the right app and confirm permission.
Option A: FaceTime
FaceTime is Apple's own video calling app and ships on every Mac.
- Open FaceTime from the Dock, Applications, or Spotlight.
- Sign in with your Apple ID if prompted.
- Type a contact's name, phone number, or email.
- Click the video call button (camera icon) to start the call.
Your Mac will ask for camera and microphone access the first time. Click OK to grant permission.
Option B: Photo Booth (Quick Test)
If you just want to confirm the camera works, Photo Booth is the fastest way to test it.
- Open Photo Booth from Applications.
- Grant camera permission when prompted.
- You'll see a live preview from your FaceTime camera.
This is the easiest sanity check before you open Zoom or Teams.
Option C: QuickTime (For Recording)
QuickTime lets you record both your screen and your webcam at the same time, which is handy for tutorials and walkthroughs.
- Open QuickTime Player.
- Click File > New Movie Recording.
- The webcam feed appears immediately.
- Click the red record button to start and stop.
If QuickTime opens with a blank screen, the camera permission hasn't been granted yet, so head back to the Privacy panel and turn it on.
How to Set Up an External USB Webcam on macOS
Most modern external webcams work as soon as you plug them in, since they rely on the standard USB Video Class (UVC) protocol that macOS already supports. No driver install needed for the popular Logitech C920, C922, Brio, Elgato Facecam, or Razer Kiyo series.
Here's the quick setup path:
- Plug the webcam into a USB-A or USB-C port directly on the Mac, not through a hub if possible.
- Wait a few seconds for macOS to recognize the device.
- Open System Settings > Privacy and Security > Camera.
- Confirm the app you're using has permission (toggle on if missing).
- Open your meeting or recording app and pick the external webcam from the camera dropdown.
If the camera doesn't show up in the app, try a different USB port, then unplug and replug the webcam. Cables and ports on cheap USB-C hubs often can't deliver enough power or bandwidth for video.
When You Actually Need a Driver
Older webcams, niche streaming cameras, and certain 4K models still ship with proprietary macOS drivers. For these, visit the manufacturer's support page, download the latest macOS driver, and install it before opening the camera app. The Logitech support site is the most common one for Mac-compatible drivers.
A driver is also required if you want access to advanced controls like exposure, white balance, zoom, or pan. The macOS built-in camera picker only handles basic on/off switching.
How to Use Continuity Camera (iPhone as Webcam)
Continuity Camera lets you use your iPhone as a high-quality wireless webcam, which is the single biggest image quality jump most Mac users can make. It was introduced in macOS Ventura (13) and iOS 16, and it's been refined in every release since.
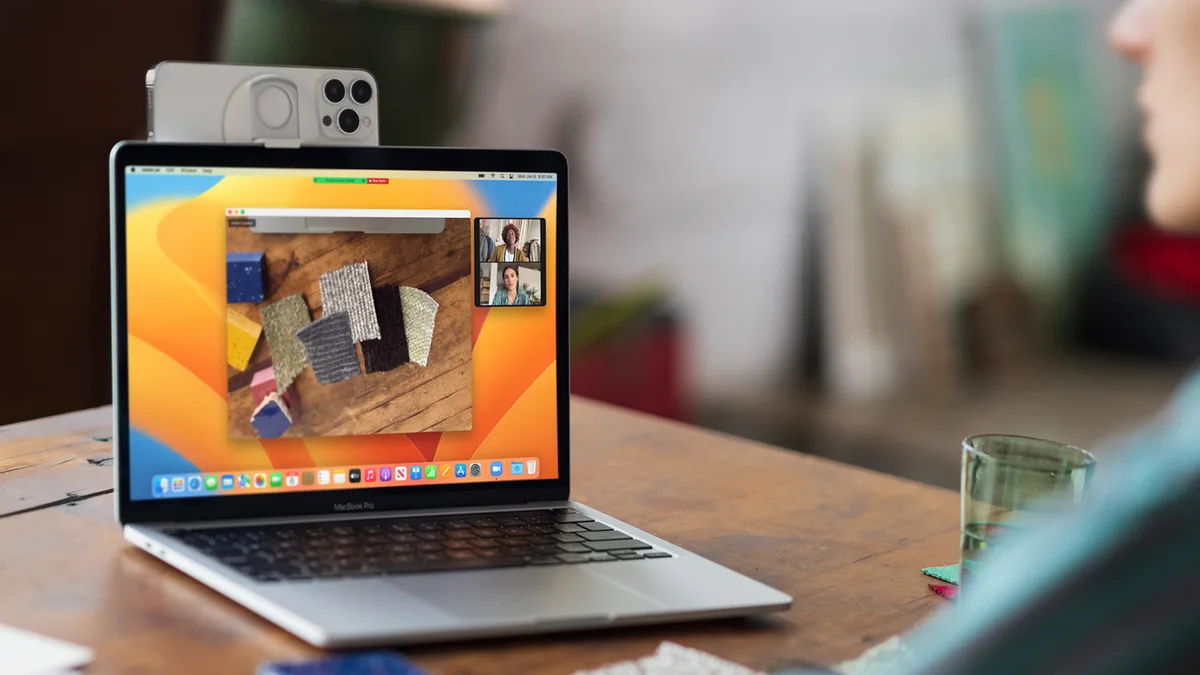
System requirements:
- Mac running macOS Ventura or later
- iPhone running iOS 16 or later
- Both devices signed into the same Apple ID
- Bluetooth and Wi-Fi turned on for both devices
- The iPhone nearby, ideally mounted to the Mac's display
Setup steps:
- Place your iPhone on a stable mount or clip near your Mac's screen.
- Open FaceTime, Zoom, Teams, or any other camera app on your Mac.
- The iPhone appears in the camera list automatically (named "John's iPhone" or similar).
- Select it, and the live feed starts within a few seconds.
Continuity Camera supports up to 1080p video, which already beats the 720p FaceTime HD camera on most older MacBooks. It also gives you access to Studio Light, Portrait Mode, and Desk View features on supported iPhones.
If your iPhone doesn't show up in the camera list, toggle Bluetooth and Wi-Fi off and back on for both devices. You can also force the connection by clicking the camera icon in the macOS menu bar after opening a supported app.
Choosing the Right Camera Inside Zoom, Teams, Meet, and FaceTime
Once macOS has the camera permission, you still have to pick the right source inside your meeting app. Each app has its own setting, and most default to whatever camera was used last.
| App | Where to Find the Camera Setting |
|---|---|
| Zoom | Settings > Video > Camera dropdown |
| Microsoft Teams | Settings > Devices > Camera dropdown |
| Google Meet | Settings (gear icon) > Video > Camera dropdown |
| FaceTime | No setting needed; uses system default |
| OBS Studio | Sources > Video Capture Device > Device dropdown |
If you don't see your external webcam or iPhone in the list, the app probably hasn't been granted camera permission. Quit the app, open System Settings > Privacy and Security > Camera, toggle the app on, and reopen it.
For users who switch between cameras often, a small free utility called "Camera Menu" adds a macOS menu bar icon that lets you swap cameras without opening each app.
Recording Your Webcam in QuickTime or OBS Studio
QuickTime is the fastest way to record a webcam clip on a Mac. As covered earlier, File > New Movie Recording opens a live preview and starts recording with one click. The default save format is .mov with H.264 video and AAC audio.
For more control, OBS Studio is the go-to free option. Here's the basic setup:
- Download OBS Studio for macOS from the official site.
- Open OBS and grant camera and microphone permission when prompted.
- In the Sources panel, click the plus (+) icon.
- Choose Video Capture Device.
- Pick your webcam or iPhone from the Device dropdown.
- Resize and position the source frame on the canvas.
OBS gives you overlays, multiple scenes, and direct streaming to YouTube or Twitch. It's heavier than QuickTime, but it's the right tool if you're recording tutorials or live content.
Fixing "Camera Not Detected" on Mac
When macOS can't find your camera at all, the issue is almost always one of three things: the app lacks permission, the camera is in use by another app, or the USB connection is failing.
Start with this order:
- Quit every app that might be using the camera (Zoom, FaceTime, Teams, OBS, Photo Booth, Chrome).
- Open System Settings > Privacy and Security > Camera and confirm the app has permission.
- Unplug external webcams, wait 10 seconds, and replug into a different USB port.
- Restart the Mac to clear any stuck camera process.
If the built-in FaceTime camera still won't appear, open Terminal and run sudo killall VDCAssistant. This restarts macOS's Video Device Controller Assistant, which is the background service that handles camera access.
If none of that works, boot into Safe Mode by holding Shift during startup. If the camera works in Safe Mode, a third-party app or login item is the culprit.
Fixing a Black Screen or Stuck Green Light
A black video feed with the green indicator light still on means macOS thinks the camera is active, but no video data is reaching the app. This usually points to app confusion, not a hardware fault.
First, quit the app entirely (Command + Q, not just close the window). Then reopen it. If that fails, restart the Mac.
The green light staying on after quit usually means another process is holding the camera, so check Activity Monitor for any leftover Zoom, Teams, or OBS processes and force quit them.
If the green light is stuck on at startup before any app even opens, run sudo killall VDCAssistant in Terminal. This restarts macOS's camera service without needing a full reboot.
Fixing macOS Sonoma 14.4 Third-Party Webcam Driver Issues
Apple changed how macOS handles legacy camera drivers in Sonoma 14.4, released March 2024. Third-party drivers now require explicit user approval before they can load, and some are blocked outright.
If your external webcam suddenly stopped working after updating to Sonoma 14.4 or later, do this:
- Open System Settings > Privacy and Security.
- Scroll to the bottom of the page.
- Look for a message about a system extension or kernel extension being blocked.
- Click "Allow" next to the camera manufacturer's extension.
- Restart the Mac.
Modern webcams using standard UVC drivers aren't affected by this change. The issue only hits cameras that ship with proprietary drivers, like older Logitech BRIO units, some Elgato capture cards, and a handful of niche streaming cameras.
Best External Webcams for Mac (Specs and Price Ranges)
Here are the most common webcams Mac users pair with their machines, with rough price ranges and specs from manufacturer documentation and aggregate retail listings.
| Model | Resolution | Frame Rate | Field of View | Typical Price |
|---|---|---|---|---|
| Logitech C920 | 1080p | 30fps | 78° | $60 to $80 |
| Logitech C922 | 1080p | 30fps (60fps at 720p) | 78° | $70 to $90 |
| Elgato Facecam | 1080p | 60fps | 82° | $130 to $160 |
| Razer Kiyo | 1080p | 30fps | 81° | $80 to $100 |
| Logitech Brio 4K | 4K | 30fps (60fps at 1080p) | 90° | $150 to $200 |
For most people taking Zoom calls or recording the occasional YouTube video, the C920 or C922 hits the sweet spot of price, quality, and macOS compatibility. The Facecam and Brio make sense for streamers and creators who want 60fps or sharper detail.
Common Mistakes Mac Users Make With Webcams
A few habits cause most of the webcam headaches we see in research:
- Forgetting to grant camera permission in System Settings after updating macOS.
- Plugging an external webcam into a USB-C hub that can't deliver enough power.
- Closing the app window with the red dot instead of fully quitting (Command + Q).
- Leaving an old meeting app running in the background, which holds the camera hostage.
- Updating macOS without checking if the webcam driver still works (especially on Sonoma 14.4+).
- Using a privacy cover that slides closed without realizing it.
Quick Troubleshooting Checklist Before You Restart
Run through this list before rebooting, since most fixes don't need a full restart:
- Quit every app that uses the camera (Zoom, FaceTime, Teams, OBS, Photo Booth, Chrome).
- Check System Settings > Privacy and Security > Camera for the right toggle.
- Unplug and replug the external webcam, or swap USB ports.
- Toggle Wi-Fi and Bluetooth off and on for Continuity Camera issues.
- Run
sudo killall VDCAssistantin Terminal if the green light is stuck on.
If none of that works, then restart the Mac. A reboot clears stale camera processes that simple app quits can't reach.
Which Setup Should You Actually Pick?
Use this quick decision guide to settle on the right webcam path for your situation.
- If you only take the occasional call and don't care about image quality: stick with the built-in FaceTime camera.
- If you want noticeably better video without buying anything: turn on Continuity Camera with your iPhone.
- If you stream, record content, or take video calls daily: invest in a dedicated external webcam like the Logitech C920 or Elgato Facecam.
- If your external webcam suddenly stops working after a macOS update: check the Privacy and Security panel for blocked extensions before buying new hardware.
In short, start with the camera you already have, fix the permission issue first, and only spend money when you've confirmed the built-in option isn't cutting it. Most "broken" webcams on Mac turn out to be a single toggle in System Settings.
Frequently Asked Questions
Why is my Mac camera not working in Zoom but works in FaceTime?
Zoom doesn't have camera permission granted in System Settings. Open System Settings > Privacy and Security > Camera, toggle on Zoom, then quit and reopen the app.
How do I test my webcam on a Mac?
Open Photo Booth from the Applications folder. If you see a live video feed, the built-in camera works. For external webcams, select it from the camera dropdown in Photo Booth's Edit menu.
Can I use my iPhone as a webcam on an older Mac?
No, Continuity Camera requires macOS Ventura (13) or later. Macs stuck on Monterey or earlier can't use this feature, and updating past the supported hardware list isn't possible.
Does macOS block third-party webcams after Sonoma 14.4?
It blocks legacy kernel extensions by default, but modern UVC webcams still work without any driver install. Check the Privacy and Security panel for a blocked extension message if your camera stopped working after the update.
How do I turn off the green camera light on my Mac?
The green light is a hardware indicator that only turns on when the camera is active. It can't be disabled manually, but quitting all apps that use the camera will turn it off within a few seconds.
Will an external webcam work without installing software on Mac?
Yes, most modern webcams use the standard USB Video Class protocol, which macOS supports natively. Plug it in, grant the app permission, and you're ready to go.
Why does my Mac say "no camera available"?
This message appears when no app has access to the camera or when another process is holding it. Quit all apps that might be using the camera, then check System Settings > Privacy and Security > Camera to confirm the active app has permission.
How do I reset the camera on a Mac?
Open Terminal and run sudo killall VDCAssistant. This restarts the camera service and clears any stuck connections. If the issue persists, restart the Mac to fully reset the camera stack.
Can I use my Mac webcam with Windows apps running in Parallels or Boot Camp?
Yes, both Parallels and Boot Camp pass the webcam through to the guest operating system. In Parallels, you may need to enable the camera in the VM's hardware settings for the Windows app to detect it.