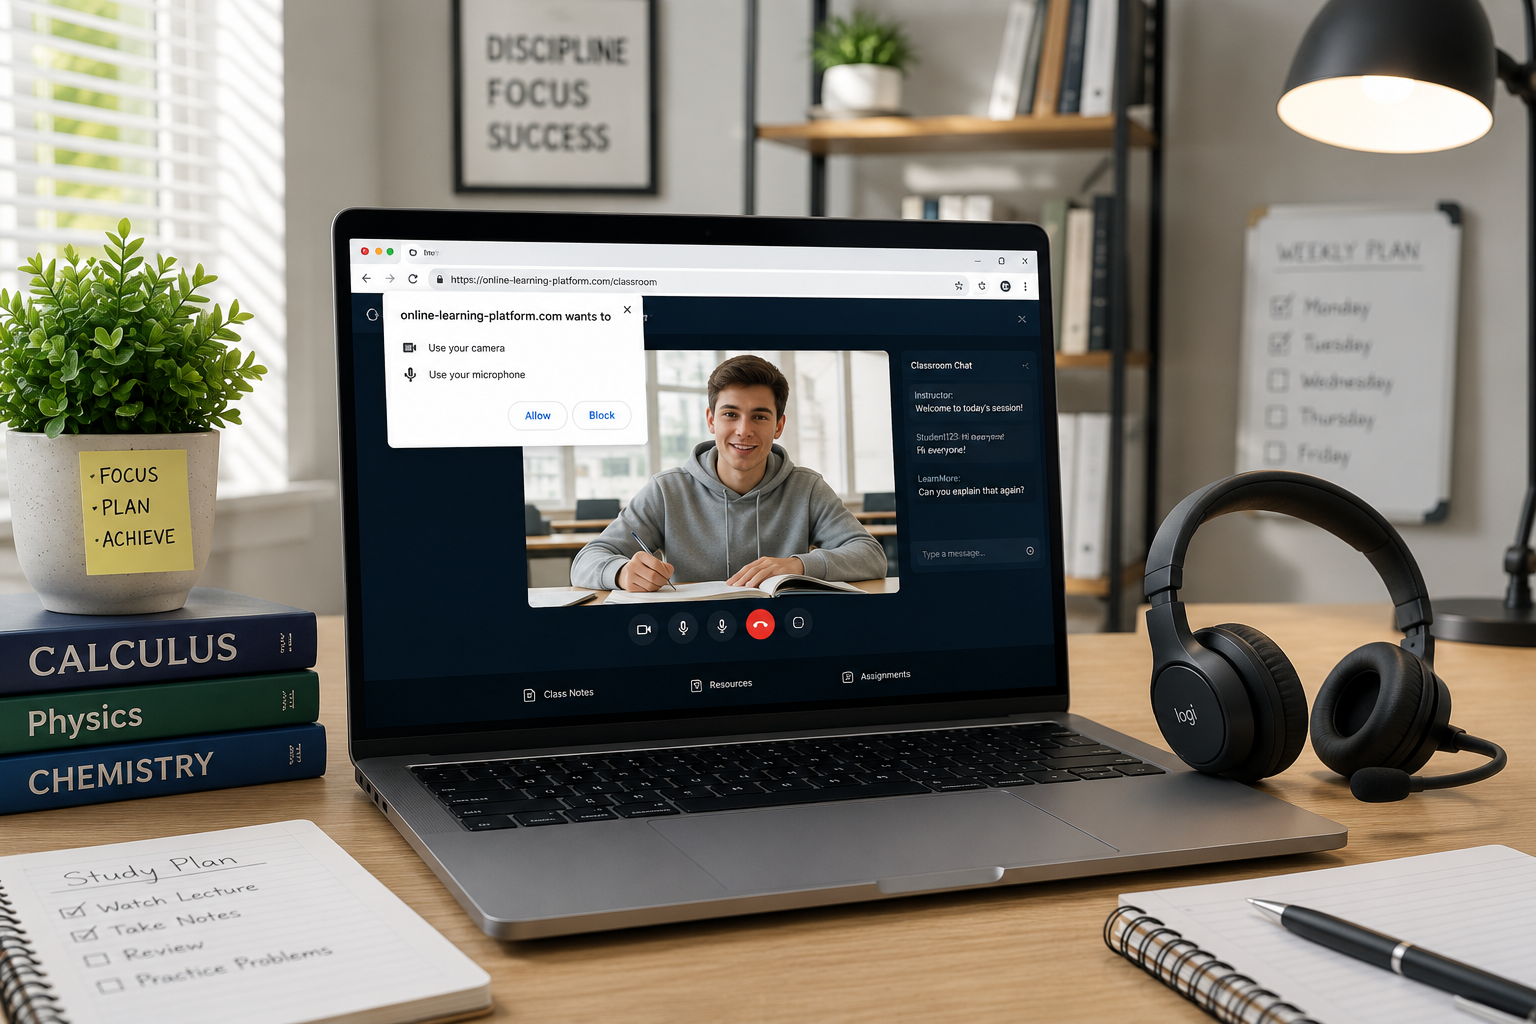
Allowing Canvas to access your microphone and webcam is crucial for a seamless online learning experience. Canvas itself does not directly access your hardware; instead, it relies on your web browser to mediate this access. When a Canvas activity, such as a virtual conference, a proctored quiz, or a media assignment, requires your microphone or webcam, your browser will display a clear prompt asking for your permission. You must explicitly grant this permission to enable communication and participation.
Navigating online courses often requires more than just reading text and submitting files. Many instructors leverage interactive tools for live discussions, group projects, and personalized feedback. Understanding how to manage your browser’s media permissions ensures you can fully engage with these dynamic learning opportunities without technical roadblocks.
Understanding How Media Access Works in Canvas (and Your Browser)
Think of Canvas as a sophisticated website. Like any website that needs to interact with your computer’s hardware, it must request permission through your web browser. The browser acts as a gatekeeper, protecting your privacy and security by requiring your explicit consent before any site can use your microphone or webcam.
This layered permission model is a fundamental security feature of modern browsers. It prevents malicious websites from secretly recording you and gives you complete control over which applications and websites can access your sensitive devices. Understanding this distinction—that you’re granting permission to your browser for a specific Canvas domain—is key to troubleshooting and maintaining your privacy.
Step-by-Step Guide: Granting Microphone and Webcam Access
Initial Prompt: The First Line of Defense
When you first access a Canvas page or activity that requires your microphone or webcam, your web browser will display a prominent pop-up notification. This prompt typically appears at the top-left corner of your browser window, near the address bar. It asks for permission to “Use your microphone” or “Use your
camera,” often specifying the Canvas domain.
You will typically see two options: “Allow” or “Block.” Clicking “Allow” grants immediate access to the requested device for that specific Canvas page. Choosing “Block” will prevent Canvas from using the device, often leading to errors within the activity.
Browser-Specific Settings for Persistent Access
Sometimes, the initial prompt isn’t enough, or you might have accidentally clicked “Block” in the past. Modern browsers store these permissions, which can be managed in their settings. Here’s how to adjust them for popular browsers:
Google Chrome
For Chrome users, managing microphone and webcam access is straightforward within the browser’s comprehensive settings.
- Open Chrome and click the three vertical dots (Menu) in the top-right corner.
- Select “Settings.”
- In the left-hand menu, click “Privacy and security.”
- Click on “Site Settings.”
- Scroll down and locate “Camera” and “Microphone” under the “Permissions” section.
- Click on “Camera” first. Ensure “Sites can ask for your camera” is selected.
- Look for “canvas.instructure.com” (or your institution’s specific Canvas domain, e.g., “yourschool.instructure.com”) in the “Allow” list. If it’s in the “Block” list, remove it or change its permission.
- Repeat the process for “Microphone.” Ensure your desired microphone is selected as the default device if you have multiple.
If you encounter issues, ensure Chrome is up to date and restart the browser after making changes. Sometimes, clearing browser cache can also resolve stubborn permission conflicts.
Mozilla Firefox
Firefox provides a clear interface for managing site-specific permissions, making it easy to grant or revoke access for Canvas.
- Open Firefox and click the three horizontal lines (Menu) in the top-right corner.
- Select “Settings.”
- In the left-hand menu, click “Privacy & Security.”
- Scroll down to the “Permissions” section.
- Find “Camera” and “Microphone” and click the “Settings…” button next to each.
- A new window will appear, listing websites that have requested access. Locate your Canvas domain (e.g., “canvas.instructure.com”).
- Ensure the “Allow” status is set for your Canvas domain. If it’s “Block,” change it to “Allow.”
- Click “Save Changes.”
Firefox also allows you to manage permissions directly from the address bar. Click the padlock icon next to the URL when on a Canvas page to view and modify site permissions instantly. This is a quick way to check if your camera or microphone is blocked.
Microsoft Edge
Microsoft Edge, built on Chromium, shares many similarities with Chrome in its settings structure, making permission management intuitive.
- Open Edge and click the three horizontal dots (Settings and more) in the top-right corner.
- Select “Settings.”
- In the left-hand menu, click “Cookies and site permissions.”
- Scroll down and click on “Camera” and “Microphone.”
- Ensure “Ask before accessing” is toggled on.
- Check the “Allow” list for your Canvas domain (e.g., “canvas.instructure.com”). If it’s under “Block,” remove it or move it to “Allow.”
- For the microphone, verify that the correct input device is selected from the dropdown menu.
If Edge still won’t access your devices, try resetting site permissions. Go to “Settings” > “Reset settings” > “Restore settings to their default values.” This can clear any corrupted permissions.
Apple Safari (macOS/iOS)
Safari’s approach to privacy and security is robust, requiring explicit permissions managed slightly differently on desktop and mobile.
On macOS:
- Open Safari.
- From the menu bar at the top of your screen, click “Safari” then select “Settings” (or “Preferences” on older macOS versions).
- Go to the “Websites” tab.
- In the left sidebar, click “Camera” and then “Microphone.”
- For both Camera and Microphone, find your Canvas domain (e.g., “canvas.instructure.com”) in the list.
- Set the permission to “Allow” or “Ask” from the dropdown menu next to the domain.
- You can also set a default behavior for all websites at the bottom of the window.
On iOS (iPhone/iPad):
- Open the “Settings” app on your device.
- Scroll down and tap on “Safari.”
- Scroll down to the “Settings for Websites” section.
- Tap “Camera” and then “Microphone.”
- Ensure the setting for Camera and Microphone is set to “Ask” or “Allow.” If it’s set to “Deny,” Canvas will not be able to access your devices.
After adjusting Safari settings, it’s a good practice to close and reopen Safari or the specific Canvas tab to ensure the new permissions take effect. This often resolves immediate access issues.
Checking Device-Level Permissions (Operating System)
Even with correct browser settings, your operating system can still block access to your microphone and webcam. Modern operating systems have their own privacy controls that override browser permissions. This is an extra layer of security and a common point of failure for media access.
Windows
Windows provides granular control over which applications can use your camera and microphone, enhancing user privacy.
- Click the Start button and select “Settings” (the gear icon).
- Click on “Privacy & security” in the left-hand menu.
- Under “App permissions,” click “Camera.”
- Ensure “Camera access” is toggled “On.”
- Also, ensure “Let apps access your camera” is toggled “On.”
- Scroll down to “Desktop apps can access your camera” and ensure this is also “On.” Your browser (Chrome, Firefox, Edge) will appear under this category.
- Repeat these steps for “Microphone” under the “App permissions” section.
Confirming these system-level permissions is often the solution when browser permissions seem correct but devices are still not detected. Restarting your computer after making these changes can also help.
macOS
macOS prioritizes user privacy, requiring explicit permission for applications to access hardware like cameras and microphones.
- Click the Apple menu in the top-left corner of your screen and select “System Settings” (or “System Preferences” on older macOS versions).
- In the sidebar, click “Privacy & Security.”
- Scroll down and click “Camera.”
- Ensure your web browser (e.g., Chrome, Firefox, Safari) is checked in the list of applications allowed to access the camera.
- Repeat these steps for “Microphone.”
If your browser is not listed, try opening the browser and attempting to use the camera/microphone in Canvas again. macOS should prompt you to add the browser to the list. If not, reinstalling the browser can sometimes refresh this list.
Chromebook (Chrome OS)
Chromebooks, with their cloud-centric design, also have specific settings for managing hardware access, typically integrated within Chrome OS settings.
- Click the time/status area in the bottom-right corner of your screen (where the Wi-Fi and battery icons are).
- Click the gear icon to open “Settings.”
- In the left-hand menu, click “Security and Privacy.”
- Click “Site settings.” This will open browser-like permissions.
- Scroll down to “Camera” and “Microphone.”
- Ensure “Sites can ask to use your camera/microphone” is selected.
- Check the “Allow” and “Block” lists to ensure your Canvas domain is not blocked.
On Chromebooks, these settings often align closely with Chrome browser settings, but checking both can eliminate potential conflicts. Make sure any external cameras or microphones are properly connected and recognized by the system.
Common Issues and Troubleshooting
Even after setting permissions correctly, you might encounter issues. Here are some common problems and their solutions.
“Microphone/Camera Not Found” Error
This error often indicates a deeper issue than just browser permissions. It means the system itself isn’t detecting the device.
The “Microphone/Camera Not Found” error can be frustrating, pointing to potential hardware, driver, or system-level conflicts. It is important to systematically check each potential cause to isolate the problem.
| Common Cause | Solution |
|---|---|
| Device is physically disconnected or loose. | Ensure your webcam and microphone (if external) are securely plugged into your computer’s USB ports. Try a different port. |
| Another application is already using the device. | Close all other applications that might be using your camera or microphone (e.g., Zoom, Google Meet, Skype, FaceTime, recording software). |
| Device drivers are outdated or corrupted. | For Windows, go to Device Manager, find your camera/microphone, right-click and select “Update driver.” For macOS, ensure your system is updated. |
| Camera/microphone is disabled in Device Manager (Windows). | Open Device Manager, expand “Cameras” or “Audio inputs and outputs,” right-click your device, and ensure it’s “Enabled.” |
| Hardware switch is off (laptops). | Some laptops have a physical switch or a function key (Fn + F-key) to disable the camera or microphone. Check your laptop’s keyboard for these. |
Low Quality or No Sound/Video
Sometimes, the device is detected, but the quality is poor, or it’s not transmitting any data. This can affect your ability to participate effectively in Canvas activities.
If your video is choppy or your audio is cutting out, consider your internet connection. A stable and fast connection is critical for real-time media streaming. Additionally, confirm that Canvas (or the browser) is selecting the correct camera if you have multiple devices connected.
- Check Bandwidth: A slow internet connection can severely degrade video and audio quality. Test your internet speed.
- Select Correct Device: Within Canvas’s conference tool or assignment submission, there’s often an option to select your camera and microphone. Ensure the correct devices are chosen, especially if you have an external webcam or headset.
- Lighting and Environment: For video, ensure good lighting and a quiet environment. Poor lighting can make your video appear grainy, and background noise can make your audio unclear.
- Test Beforehand: Use a simple online webcam/microphone tester (search “online webcam test” or “online mic test”) to confirm your devices are working outside of Canvas.
Accidental Blocking and Re-enabling
It’s easy to accidentally click “Block” on a browser permission prompt, especially when distracted. Re-enabling access is usually a quick fix.
If you’ve accidentally blocked access, don’t worry. All modern browsers provide simple ways to reverse this decision. The key is to remember that these permissions are stored site-by-site within your browser’s settings.
- Address Bar Icon: While on the Canvas page, look for a small icon in the address bar (often a camera or microphone icon, or a padlock icon). Clicking this icon often provides a quick way to manage permissions for that specific site.
- Browser Settings: Revisit the browser-specific settings outlined earlier (Chrome: Site Settings, Firefox: Privacy & Security > Permissions, Edge: Cookies and Site Permissions, Safari: Websites tab). Locate your Canvas domain and change its permission from “Block” to “Allow” or “Ask.”
Best Practices for Using Microphone and Webcam in Canvas
Ensuring your microphone and webcam work correctly for Canvas isn’t just about technical settings; it’s also about preparing for your online interactions. Following a few best practices can significantly enhance your experience and avoid last-minute stress.
- Test Your Setup Before Class: Always test your microphone and webcam a few minutes before a live session or before starting a video assignment. Many Canvas tools, like Conferences or Studio, offer testing functionalities.
- Optimize Your Environment: Choose a well-lit and quiet space. Good lighting (preferably natural light facing you) improves video quality, and a quiet background ensures your audio is clear.
- Use a Headset for Audio: A headset with a built-in microphone significantly reduces background noise and prevents echo, making your audio clearer for others.
- Prioritize Privacy: Be mindful of your background. Use virtual backgrounds if available, or ensure your physical background is tidy and appropriate for an academic setting.
- Close Unnecessary Applications: Other programs can consume bandwidth or system resources, affecting your camera and microphone performance. Close anything you don’t need during your Canvas activity.
- Keep Software Updated: Regularly update your operating system, web browser, and any webcam/microphone drivers. Updates often include performance improvements and bug fixes.
“Effective communication is at the heart of online learning, and reliable access to microphones and webcams is foundational,” states Dr. Amy Smith, a leading researcher in educational technology at Arizona State University. “Students who feel confident in their technical setup can focus more on learning and less on troubleshooting, leading to better engagement and outcomes.”
The reliance on such technology continues to grow. A report by the National Center for Education Statistics (NCES) indicated that in 2021-2022, approximately 75% of undergraduate students in the United States took at least one distance education course, with video conferencing being a primary mode of interaction. This trend has likely continued or increased into 2026, highlighting the critical nature of these tools for student success.
FAQ Section
Can Canvas record me without my permission?
No, Canvas itself cannot record you without your explicit permission. For any recording functionality, Canvas tools like Conferences or Studio will prompt you, and your web browser will also ask for permission to access your microphone and webcam. You must grant both these permissions for any recording to occur.
Why does my browser keep asking for permission?
Your browser asks for permission each time a new site or a specific Canvas activity requests access to your devices as a security measure. While you can set persistent “Allow” permissions for your Canvas domain in your browser settings, some activities or privacy settings might cause the prompt to reappear. This ensures you are always aware of when your hardware is being accessed.
What if I don’t have a webcam or microphone?
If you do not have a built-in webcam or microphone, you can purchase external USB devices. Many affordable webcams and headsets are available. Alternatively, some Canvas activities might offer alternative ways to participate, such as typing in a chat or submitting audio/video files created separately.
Does Canvas access my files or other data?
Canvas only accesses data that you explicitly upload or share within the platform. Granting microphone and webcam access allows Canvas (through your browser) to capture audio and video input for specific activities. It does not grant Canvas access to your personal files, documents, or other sensitive data stored on your computer.
Can my instructor see if I’ve turned off my camera?
Yes, in live virtual conference tools within Canvas, if your camera is off, your instructor will typically see a blank screen or your profile picture instead of your live video feed. The specific interface may vary based on the conferencing tool used (e.g., BigBlueButton, Zoom integrated with Canvas), but generally, your video status is visible to others in the session.
Conclusion
Mastering the settings for your microphone and webcam in Canvas is a foundational skill for success in modern online education. By understanding how your browser and operating system manage these permissions, you gain crucial control over your privacy and the ability to fully engage with interactive learning experiences. Always remember to grant necessary permissions, troubleshoot systematically, and follow best practices to ensure your voice and presence are heard and seen clearly within your Canvas courses. Your proactive approach to these technical details empowers you to focus on what truly matters: your learning.