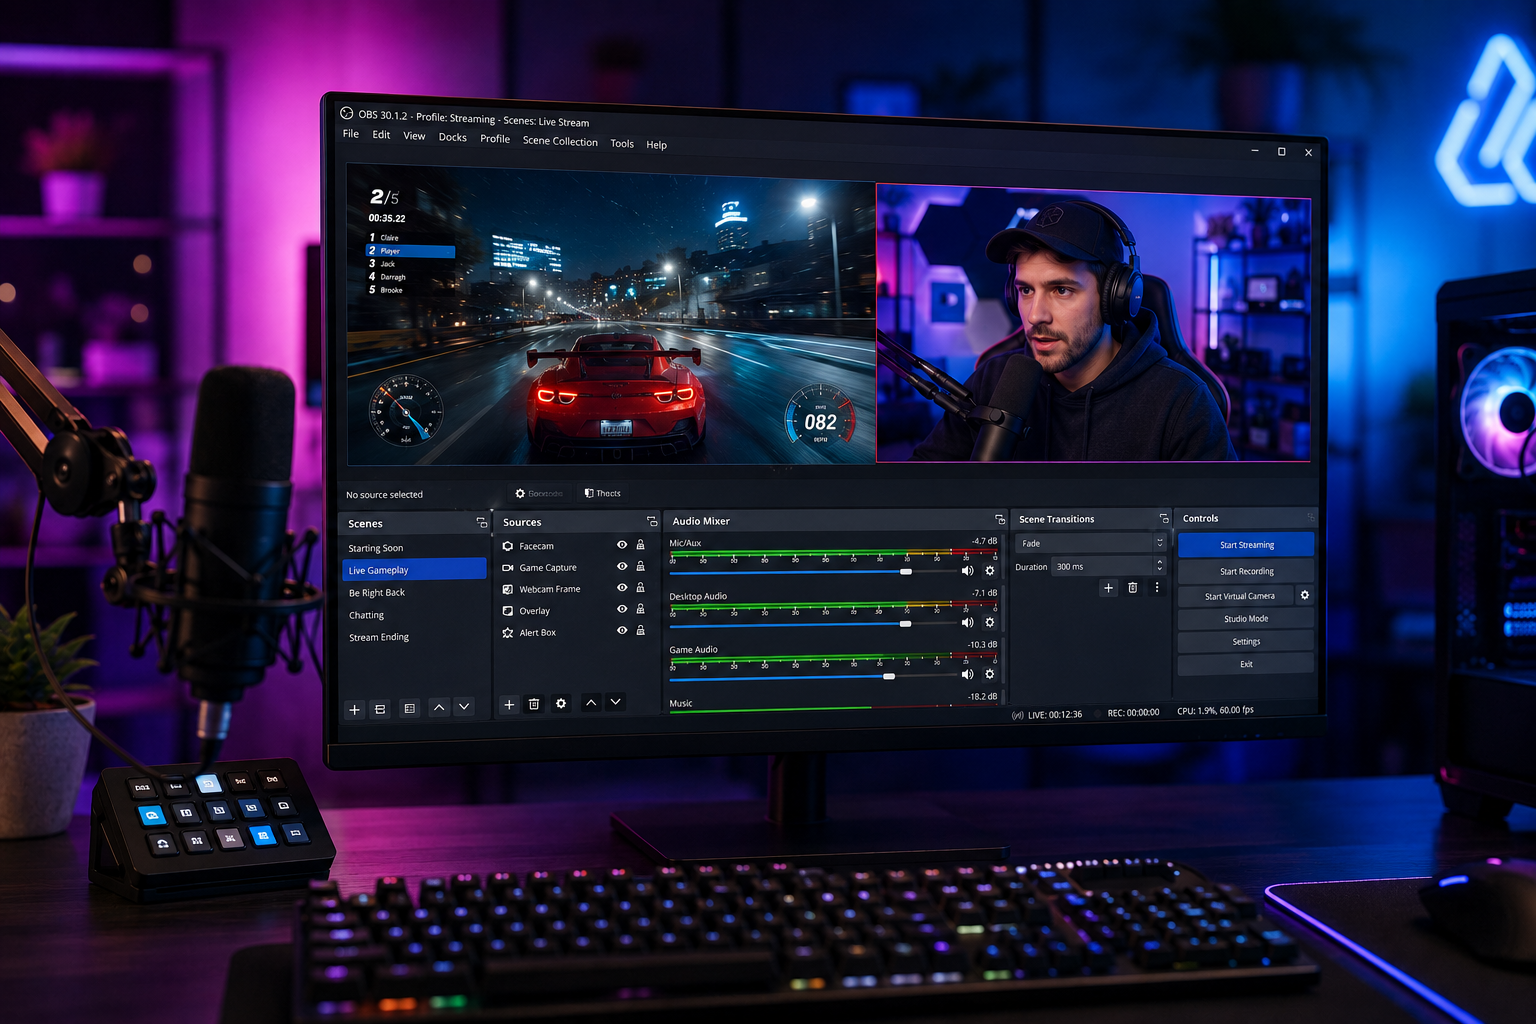
Recording your webcam and gameplay separately in OBS is not just possible; it’s a fundamental technique that elevates your content quality and streamlines your post-production workflow. The key to achieving this separation lies in configuring OBS to record multiple audio tracks and ensuring your webcam is an independent video source. This approach allows you to adjust, edit, or even remove your commentary or webcam footage without impacting your game audio or video, giving you unparalleled flexibility in the editing suite.
Imagine having complete control over every element of your video after you’ve finished recording. This level of granular control is crucial for any serious content creator. Whether you’re a seasoned streamer, an aspiring YouTuber, or simply looking to improve your personal recordings, mastering separate audio and video tracks in OBS will transform your editing process from a chore into a creative opportunity. No longer will you be stuck with perfectly good gameplay ruined by a cough or a poorly timed comment; you’ll have the power to fix it.
Why Separate Recording is a Game Changer for Content Creators
The ability to isolate your webcam and gameplay elements during recording offers numerous advantages that directly impact the quality and versatility of your final product. This method moves beyond basic recording, giving you professional-grade control over your content.
Benefits of Recording Separately
- Enhanced Editing Flexibility: You can independently adjust volumes, apply effects, or even mute specific audio tracks, like your microphone or game sound, without affecting the others. This is invaluable for balancing sound levels.
- Dynamic Video Placement: With your webcam as a separate video source, you can easily resize, reposition, or remove it entirely in post-production. This means you are not locked into the overlay you set during recording.
- Error Correction Made Easy: If your microphone clips, a phone rings, or you make a mistake, you can edit out just your commentary track without losing precious gameplay footage. This saves countless hours of re-recording.
- Improved Audio Quality: Separate tracks allow you to process your microphone audio with noise reduction, compression, or EQ in your editing software, resulting in clearer, more professional-sounding commentary.
- Content Versatility: You can export versions of your video with or without commentary, or with different webcam placements, catering to various platforms or audience preferences from a single recording session.
According to a 2024 survey by StreamElements and Rainmaker.gg, nearly 70% of top streamers utilize multi-track recording or similar techniques to enhance their VOD (Video On Demand) content and post-production capabilities. This statistic underscores the industry standard for high-quality content creation.
Essential OBS Setup for Separate Tracks
Before you hit record, correctly configuring OBS is paramount. This involves setting up your audio devices, defining your video sources, and crucially, telling OBS how to save these elements onto distinct tracks.
Audio Mixer Configuration: The Heart of Separation
The OBS Audio Mixer is where you assign individual audio sources to specific output tracks. Each source, whether it’s your microphone, game audio, or desktop sound, needs to be routed correctly. The goal is to isolate each audio component onto its own track within your recording file.
To access these settings, locate the “Audio Mixer” dock in OBS. For each audio source listed, click the gear icon to open its Properties, then click Advanced Audio Properties. Here, you will see a list of your audio sources and checkboxes for up to six audio tracks. Assign each unique audio source to its own dedicated track. For instance, your microphone might be on Track 1, game audio on Track 2, and Discord chat on Track 3. This granular control gives you immense power in editing.
Proper audio routing ensures that when you load your recording into a video editor, each audio component appears on its own timeline track. This simplifies editing dramatically, allowing you to adjust volumes, apply effects, or cut segments without affecting other sounds.
Video Source Setup: Your Visual Components
For separate video elements, the approach is simpler yet equally effective. You will configure your webcam and game capture as distinct sources within an OBS scene. This inherently treats them as separate layers that can be manipulated independently in post-production.
In your OBS scene, you’ll typically have at least two main video sources: your Game Capture (or Display Capture/Window Capture for gameplay) and your Video Capture Device (your webcam). Ensure each is added and configured correctly. The beauty of this setup is that even though they are composited together in your OBS preview, the underlying video file contains both elements as distinct layers, assuming your editing software can parse them, which most modern NLEs (Non-Linear Editors) can. This allows you to scale, crop, move, or even toggle the visibility of your webcam layer after the recording is done. Treating your webcam as a standalone source provides maximum flexibility for visual adjustments in editing.
Step-by-Step Guide: Recording Separately with OBS
Let’s walk through the precise steps to configure OBS for separate webcam and gameplay recording, ensuring both visual and auditory separation.
Step 1: Install and Configure OBS Studio
First, ensure you have the latest version of OBS Studio installed. You can download it for free from the official OBS Project website. After installation, launch OBS.
Go to File > Settings in OBS. In the General tab, select your preferred language and make any other general adjustments. This initial setup is crucial for a smooth recording experience.
Step 2: Set Up Your Scenes and Sources
In OBS, a Scene is a collection of sources that create your desired layout. You’ll typically have one main scene for gameplay and webcam.
- Create a New Scene: In the ‘Scenes’ dock, click the ‘+’ button and name your scene (e.g., “Gameplay with Webcam”).
- Add Game Capture Source: In the ‘Sources’ dock, click the ‘+’ button, select Game Capture, and give it a name. In the properties, choose “Capture any fullscreen application” or “Capture specific window” and select your game. Ensure it’s correctly displaying.
- Add Webcam Source: Again, in the ‘Sources’ dock, click ‘+’, select Video Capture Device, and name it. In the properties, choose your webcam from the dropdown list. Adjust resolution and FPS as needed. Position and resize your webcam overlay within the OBS preview to your liking. Remember, you can change this later in editing.
- Add Microphone Source: In the ‘Sources’ dock, click ‘+’, select Audio Input Capture, and name it (e.g., “Microphone”). Choose your primary microphone from the device list.
- Add Desktop Audio Source: OBS usually adds a Desktop Audio source by default. If not, add an Audio Output Capture source and select your main playback device (e.g., “Speakers (Realtek High Definition Audio)”). This captures all sounds coming from your computer, including game audio.
Step 3: Configure Audio Output Settings for Multi-Track Recording
This is where the magic happens for separate audio tracks.
- Go to File > Settings > Output.
- Select the Recording tab.
- Recording Format: Choose MKV. MKV is highly recommended because it can recover recordings if OBS crashes or your computer loses power. You can remux MKV to MP4 later if your editor requires it (File > Remux Recordings). While MP4 is common, it risks data loss if the recording is interrupted.
- Audio Tracks: Crucially, check multiple boxes here. For most setups, you’ll want at least two, but up to six are available. For example, check Tracks 1, 2, and 3.
- Encoder: Select a suitable encoder. For NVIDIA users, NVENC (new) is excellent for performance. AMD users have AMF, and Intel users have QuickSync. If you have a powerful CPU, x264 is an option but uses more CPU resources.
Now, go to the Audio Mixer dock in the main OBS window. Click the gear icon next to any source, then select Advanced Audio Properties.
- Assign Tracks:
- For your “Microphone” source: Check only Track 1. Uncheck all other tracks.
- For your “Desktop Audio” (which includes game sound): Check only Track 2. Uncheck all other tracks.
- If you have a separate “Discord” or “Music” source (using virtual audio cables), assign it to Track 3.
This step is the most critical for audio separation. Double-check that each unique audio source is assigned to its own, distinct track.
Step 4: Configure Recording Output Settings
Beyond audio tracks, ensure your overall recording settings are optimized for quality and file size.
- Stay in File > Settings > Output > Recording tab.
- Recording Path: Set a destination folder where your recordings will be saved. Make sure you have enough disk space.
- Rate Control: CBR (Constant Bitrate) is standard.
- Bitrate: This significantly impacts file size and quality. For 1080p 60fps, 45,000 to 60,000 Kbps is a good starting point for high-quality recordings. For 1440p, aim for 60,000-80,000 Kbps. Adjust based on your system’s capabilities and desired quality.
- Keyframe Interval: Set to 2 seconds.
- Preset/Quality: For NVENC, “Max Quality” or “Quality” is ideal. Balance quality with performance.
- Profile: “High” is generally recommended.
These settings balance visual fidelity with manageable file sizes, crucial for post-production and storage. Optimizing your bitrate and encoder settings is key to achieving crisp visuals without overloading your system.
Step 5: Start Recording and Verify
With all settings configured, you are ready to record.
- Click “Start Recording” in the OBS main window.
- Record a short test clip (e.g., 30-60 seconds) with both gameplay and commentary.
- Stop the recording.
- Verify in Editing Software: Open your recorded MKV file in your video editing software (e.g., Adobe Premiere Pro, DaVinci Resolve, Vegas Pro). You should see one video track and multiple audio tracks corresponding to your OBS assignments (e.g., Microphone on A1, Game Audio on A2).
If you see separate audio tracks, congratulations! Your setup is successful. If not, revisit the Advanced Audio Properties in OBS and ensure each source is routed to a unique track.
Post-Production Workflow and Benefits
Once you have your multi-track recording, the real power of this setup comes to life in your video editing software. This is where you leverage the separation to create polished, professional content.
Editing with Separate Tracks
Most modern non-linear editing (NLE) software, such as Adobe Premiere Pro, DaVinci Resolve, and Vegas Pro, fully supports multi-track audio from formats like MKV. When you import your recording:
- The video stream will appear as a single video track.
- Each assigned audio track (e.g., mic, game, Discord) will appear as a separate audio track on your timeline.
This allows for independent manipulation:
- Volume Adjustments: Easily balance your voice against the game audio. If the game gets too loud, you can duck its volume without affecting your commentary.
- Noise Reduction & Effects: Apply noise gates, compressors, or EQs specifically to your microphone track without altering the game’s sound.
- Cutting & Syncing: If you need to cut out a section of your commentary, you can do so precisely, then re-sync or stretch the remaining audio without creating awkward silences in the game audio.
- Webcam Control: Since your webcam is a distinct source in OBS, it’s captured as part of the main video stream but can be cropped, resized, moved, or even keyframed (made to appear/disappear) within your NLE. Some advanced editors can even extract the webcam layer for more complex effects, but even basic resizing offers significant flexibility.
The flexibility extends beyond simple adjustments. You can experiment with different audio mixes, create sound effects layers, or even prepare versions of your video for different platforms with varying audio requirements. This level of control is what truly differentiates amateur recordings from professional productions.
To further illustrate the advantages, consider this comparison:
| Feature | Combined Recording (Single Audio Track) | Separate Recording (Multi-Track Audio) |
|---|---|---|
| Audio Balancing | Difficult; game audio and mic are merged. | Easy; independent volume control for each. |
| Noise Reduction | Applies to all audio, potentially distorting game sound. | Applied only to specific tracks (e.g., mic), preserving other audio. |
| Error Correction | Requires re-recording entire segments or complex edits. | Simple cuts or edits on a specific audio track. |
| Post-Production Time | Often longer due to limited flexibility and workarounds. | Shorter, more efficient due to direct control. |
| Content Versatility | Limited to one audio mix. | Multiple audio mixes and export options from one recording. |
Advanced Tips and Troubleshooting
While the basic setup covers most needs, experienced creators often encounter specific challenges or look for ways to further refine their workflow. Here are some advanced tips and common troubleshooting solutions.
Using Virtual Audio Cables for Granular Control
For even greater audio separation—like having game audio, Discord chat, and music on completely separate tracks—you’ll need virtual audio cables. Programs like VoiceMeeter Banana or VB-Cable create virtual audio devices that you can route specific applications through.
For example, you can set Discord’s output to a virtual cable, then add that virtual cable as an Audio Input Capture source in OBS, assigning it to its own track (e.g., Track 3). This ensures your viewers hear your teammates, but you can adjust their volume independently in post-production. Virtual audio cables unlock the full potential of multi-track audio, offering unparalleled control over every sound source.
Common Issues and Solutions
- No Separate Audio Tracks in Editor:
- Solution: Double-check OBS Settings > Output > Recording tab to ensure multiple audio tracks are checked. Then, go to Advanced Audio Properties in the Audio Mixer and verify each source is assigned to a unique track.
- Game Audio is Missing/Too Low:
- Solution: Ensure your Desktop Audio source is active in OBS and its volume isn’t muted or too low. Check your game’s in-game audio settings. Sometimes, OBS needs to be run as administrator to capture certain games’ audio.
- Microphone Audio Sounds Bad/Clips:
- Solution: Check your mic’s input level in OBS. Add an OBS filter like a Noise Gate, Compressor, or Gain to your mic source. Ensure your mic isn’t peaking in the OBS Audio Mixer.
- Webcam Freezes or Drops Frames:
- Solution: Check your webcam’s USB connection and ensure it’s not sharing bandwidth with other high-demand devices on the same USB hub. Lower the webcam’s resolution or FPS in its OBS properties if necessary. Ensure your computer’s resources (CPU, GPU) aren’t maxed out.
- Large File Sizes:
- Solution: While separate tracks add some overhead, video bitrate is the primary factor. Consider slightly reducing your video bitrate in Settings > Output > Recording. Ensure you’re using an efficient encoder (like NVENC or AMF) if available. MKV files can be large, but the flexibility is usually worth it.
- Editor Doesn’t Recognize MKV:
- Solution: Use OBS’s File > Remux Recordings feature to convert your MKV file to MP4. This process is very fast and doesn’t re-encode the video, so there’s no quality loss. Always record in MKV first for safety.
FAQs
Can I record webcam and gameplay as two completely separate video files in OBS?
While OBS records them as distinct layers within a single video file, offering full post-production control, it doesn’t natively create two entirely separate video files (one for webcam, one for gameplay) from a single recording session. The recommended and most efficient method is to record a single MKV file with separate audio tracks and the webcam as an independent source within that file, allowing separation in editing.
Do separate audio tracks take up significantly more disk space?
No, the impact on file size from adding more audio tracks is generally minimal compared to the video bitrate. The vast majority of a recording’s file size comes from the video stream itself. Recording multiple audio tracks provides immense flexibility for a negligible increase in file size.
What’s the best recording format for separate tracks in OBS?
The MKV format is highly recommended for multi-track recording in OBS. It is robust and can recover your recording if OBS crashes or your computer shuts down unexpectedly. You can easily remux (convert without re-encoding) an MKV file to MP4 after recording if your editing software prefers MP4.
Can I record multiple webcams separately in OBS?
Yes, you can add multiple Video Capture Device sources to your OBS scene, each corresponding to a different webcam. They will all be composited into the main video stream. In post-production, you can crop and manipulate these distinct webcam regions independently, offering flexibility similar to having separate webcam layers.
Conclusion
Recording your webcam and gameplay separately in OBS using multi-track audio and distinct video sources is a foundational skill for any serious content creator. It unlocks an unparalleled level of flexibility in post-production, allowing you to fine-tune every aspect of your audio and visuals. By following the detailed steps outlined, from configuring advanced audio properties to understanding your recording output, you can transform your raw footage into polished, professional-grade content.
Embracing this workflow means less time re-recording and more time creating. The ability to individually adjust volumes, apply specific audio effects, and dynamically position your webcam in editing empowers you to produce higher-quality, more engaging videos. Start implementing these techniques today, and experience the significant difference they make in your content creation journey.